Showing posts with label butter. Show all posts

January 15, 2016

Spinach Souffle

No comments:
Yum
Maybe this is a souffle, maybe it isn't. I'm still unclear. One thing for certain is that it is delicious, nutritious, and fun to boot. Simple, easy, and foolproof. Play around with the spices, amount of cheese, and other leafy greens. Anything light will work. Enjoy!


Spinach Souffle

Yield: 6 servings
Ingredients
  • 10 eggs
  • 2 tablespoons garlic, diced
  • 5 tablespoons parmesan
  • 2 tablespoons butter
  • 5 ounces spinach
  • 1/4 teaspoon salt
  • 1/4 teaspoon pepper
Cooking Directions
  1. Steam or microwave the spinach for 2 minutes. Drain.
  2. Preheat the oven to 375 F.
  3. In a loaf pan, whisk the eggs until slightly frothy.
  4. Whisk in the salt, pepper, and any other spices, 3 ounces of parmesan, and the garlic.
  5. Melted the butter and mix into the eggs.
  6. Mix in the spinach.
  7. Sprinkle the remaining parmesan on the top.
  8. Bake for 30 minutes, until browned on top. Serve immediately, otherwise the souffle will start to deflate.

April 10, 2015

Perfect Collard Greens

No comments:
Yum
These are the perfect basic collard greens. As is, they're vegan. From here, you can fancy them up however you like. They go great with some mac and cheese. Enjoy!

Perfect Collard Greens

Yield: 6 servings
Ingredients
  • 1 large bunch collard greens
  • 1 tablespoon butter
  • 1 tablespoon salt
  • 1 tablespoon black pepper
  • 1 tablespoon garlic powder
  • 1 tablespoon hot sauce
Cooking Directions
  1. In a large pot, bring 3 quarts of water to a boil and add seasoning and hot sauce. Reduce heat to medium.
  2. Wash the collard greens thoroughly. Slice into 1/2 to 1-inch thick slices.
  3. Place greens in pot and add butter. Cook for 45 to 60 minutes, stirring occasionally. When done, taste and adjust seasoning.

April 03, 2015

Sinful Baked Mac and Cheese

No comments:
Yum
Deliciously sinful baked mac and cheese is a luxury. A luxury in that it's so rich, you should probably only have a small portion and have a large salad and steamed veggies with it. It's not, however, a luxury in time or cost. Extremely easy and simple, this will fulfill any mac and cheese craving you're likely to have for a long time. Enjoy!


Sinful Baked Mac and Cheese

Yield: 8-12 servings
Ingredients
  • 4 tablespoons unsalted butter
  • 2 3/4 cups milk
  • 1/4 cup flour
  • 1/8 teaspoon nutmeg
  • 1/4 teaspoon black pepper
  • 1/4 teaspoon cayenne pepper
  • 2 cups (8 ounces) sharp white cheddar cheese, grated
  • 1 cup (4 ounces) Gruyere, grated OR
  • 1/2 cup parmesan, grated
  • 1/2 pound macaroni or similar
Cooking Directions
  1. Preheat oven to 375 F. Butter a 3-quart casserole dish; set aside.
  2. Warm the milk in a medium saucepan over medium heat.
  3. Melt the remaining butter in a large skillet over medium heat. When it bubbles, add the flour. Cook, stirring, for 1 minute.
  4. While whisking, slowly pour in the hot milk a little at a time to keep the mixture smooth. Continue whisking constantly until the mixture bubbles and becomes thick, 8 to 12 minutes.
  5. Remove the pan from the heat. Stir in nutmeg, black pepper, cayenne pepper, 1 1/2 cups cheddar cheese, and 3/4 cups Gruyère (or 1/4 cup parmesan). Set the cheese sauce aside.
  6. Bring a large pot of salted water to a boil. Cook the macaroni until the outside of is cooked and the inside is underdone, 2 to 3 minutes. Rinse under cold water and drain the macaroni. Stir the macaroni into the cheese sauce.
  7. Pour the mixture into the baking dish. Sprinkle the remaining cheeses over the top. Bake until golden brown, about 30 minutes. Transfer the dish to a wire rack for 5 minutes to set, then serve.

March 20, 2015

Flourless chocolate cake

No comments:
Yum
Flourless chocolate cake is one of those delicacies that seems difficult but is not. There are only a few ingredients, and the hardest part is letting a mixer beat the egg whites into stiff peaks. If you're gluten free, then you can have your cake and eat it too! Unless you eat the whole thing at once. And top is off with some fruit, whipped cream, and/or a caramel sauce. When it's this good, this becomes a judgement-free zone. Enjoy!

Flourless chocolate cake

Yield: 16 servings
Ingredients
  • 1 lb bittersweet chocolate, chopped into small pieces
  • 1 stick unsalted butter
  • 9 eggs, separated
  • 3/4 cup sugar
  • 1 teaspoon vanilla extract
Cooking Directions
  1. Preheat the oven to 375 F.
  2. Butter a springform pan.
  3. Put the chocolate and butter into a stainless steel mixing bowl and heat over (but not touching) about 1 inch of simmering water until melted, stirring occasionally.
  4. Meanwhile, whisk the egg yolks with the sugar and vanilla in a mixing bowl until pale yellow in color.
  5. Whisk the chocolate mixture into the egg yolk mixture.
  6. Beat the egg whites in a mixing bowl until stiff peaks form and fold into the chocolate mixture.
  7. Pour into the cake pan and bake until the cake is set and a toothpick inserted into the cake comes out with moist crumbs clinging to it, about 20 minutes. Let stand at least 10 minutes, then remove sides of pan.

February 06, 2015

The Best Cheddar Biscuits

No comments:
Yum

Biscuits are easy to make, but don't mess with it too much. The secret to flaky and tender biscuits is all in how the butter is distributed throughout the dough. If done correctly, it'll melt and puff up the biscuits when they bake at a high temperature. This is an adaptation from America's Test Kitchen, so you know it's perfect. Enjoy!

If you don't have buttermilk, just use milk mixed with lemon juice or vinegar. Add one tablespoon of lemon juice or vinegar to a measuring cup. Fill to 1 cup with milk. Let sit 5 minutes before using.


The Best Cheddar Biscuits

Yield: 20-24 biscuits
Ingredients
  • 2 cups all-purpose flour
  • 2 teaspoons baking powder
  • 1/2 teaspoon baking soda
  • 1 teaspoon sugar
  • 3/4 teaspoon salt
  • 4 oz. cheddar cheese, grated
  • 1 cup buttermilk (or substitute)
  • 8 tablespoons butter, melted and cooled
  • 2 tablespoons butter, melted, for brushing biscuits
  • 1 garlic clove
  • 1 tablespoon fresh parsley, minced
Cooking Directions
  1. Preheat the oven to 475 degrees. Line a rimmed baking sheet with parchment paper.
  2. Melt 1 stick of butter first and set aside to cool.
  3. Whisk the flour, baking powder, baking soda, sugar, and salt in a large bowl until evenly mixed.
  4. Add the grated cheese and mix it into the dry ingredients.
  5. Pour the cold buttermilk (or substitute) into a medium bowl. Pour in the cooled, melted butter and mix it together with a whisk or a fork.
  6. Make a well in the center of the dry ingredients. Pour in the buttermilk mixture and mix the batter quickly and gently, just until the batter is moistened and comes together. Do not over-mix the batter.
  7. Use a large spoon to scoop up and portion out the batter onto the baking sheet for 20-24 biscuits.
  8. Bake the biscuits in the preheated oven for 12-14 minutes, until golden brown.
  9. While the biscuits are baking, melt the remaining 2 tablespoons of butter. Add the garlic and the minced parsley to the butter.
  10. When the biscuits are baked, brush the biscuits with the melted garlic-parsley butter.

September 10, 2014

Bismarck or Dutch Baby

No comments:
Yum
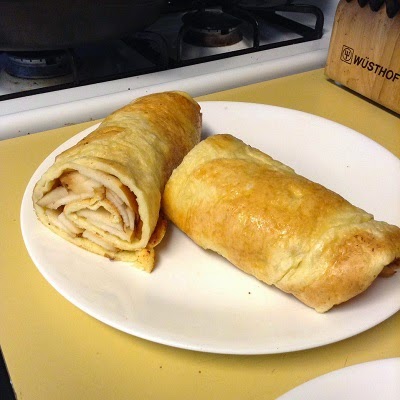
Sometimes called a Bismarck, sometimes a Dutch Baby, sometimes a German Pancake, and sometimes probably a whole mess of things. What it is is a baked pancake that houses some delicious fruit (if desired), and a warm, soft interior, yet crispy exterior.

Easier and quicker to make than regular pancakes and possibly even healthier because it's sugar free. This naturally no added sugar pancake will please everyone. Other variations include cooked fruit or preserves or plain with a dusting of powdered sugar and or cinnamon. Enjoy!


Bismarck or Dutch Baby

Yield: 4 servings
Ingredients
  • 1/2 stick butter
  • 1/2 cup flour
  • 1/2 cup milk
  • 2 eggs
  • 1 pear, sliced thin
  • lemon juice
Cooking Directions
  1. Heat oven to 475 F.
  2. Place butter in cast iron or oven-safe dish. Put in oven once it has reached 475 F. Melt the butter until it sizzles and then take it out.
  3. Meanwhile, mix together the flour, milk, and eggs into a batter. Do not overmix.
  4. Make sure the butter has coated the entire pan, and pour the batter into the center.
  5. Bake in the oven for 12 minutes, until it has puffed up and started to brown.
  6. Take the pan out and place the Bismarck / Dutch Baby on a plate.
  7. Sprinkle lemon juice over it and place pear slices everywhere.
  8. Roll it up and serve immediately.

April 16, 2014

Cinnamon Raisin Swirl Bread

No comments:
Yum

The recipe is easily doubled, and it would probably be easier to mix that way. It could do with more cinnamon flavor, so maybe double that or incorporate into the dough somehow.

Make this for Easter breakfast. Enjoy!

Cinnamon Raisin Swirl Bread

Yield: 1 loaf
Ingredients
    Dough
  • 4 tablespoons unsalted butter
  • 10 1/3 oz bread flour
  • 1 3/8 oz nonfat dry milk powder
  • 1/6 cup sugar
  • 1/2 tablespoon yeast
  • 6 oz warm water (110 degrees)
  • 1/2 egg, beaten
  • 3/4 teaspoon salt
  • Filling
  • 3/4 cup raisins
  • 1.5 tablespoons cinnamon
  • 1/2 teaspoon vanilla extract
  • 1/4 teaspoon salt
  • Egg Wash
  • 1/2 egg, beaten
  • a pinch of salt
Cooking Directions
  1. Cut butter into 16 pieces and toss with 1/2 tablespoon flour; set aside to soften while mixing dough.
  2. Whisk remaining flour, milk powder, sugar, and yeast together in bowl of stand mixer. Using stand mixer fitted with dough hook, add water and 1/2 an egg and mix on medium-low speed until cohesive mass forms, about 2 minutes, scraping down sides of bowl as necessary. Cover mixing bowl with plastic wrap and let stand for 20 minutes.
  3. Adjust oven rack to middle position and place metal loaf or cake pan on bottom of oven.
  4. Remove plastic from mixer bowl, add salt, and mix on medium-low speed until dough is smooth and elastic and clears sides of bowl, 7 to 15 minutes. With mixer running, add butter, a few pieces at a time, and continue to knead until butter is fully incorporated and dough is smooth and elastic and clears side of bowl, 3 to 5 minutes longer. Add raisins and mix until incorporated, 30 to 60 seconds.
  5. Transfer dough to large greased bowl, and using a bowl scraper or rubber spatula, fold dough over itself by gently lifting and folding edge of dough toward middle. Turn bowl 90 degrees and fold again. Turn bowl and fold dough 6 more times (for a total of 8 folds). Cover tightly with plastic and transfer to middle rack of oven. Pour 3 cups of boiling water into loaf pan in oven, close oven door, and allow dough to rise for 45 minutes.
  6. Remove bowl from oven and gently press down on center of dough to deflate. Repeat folding step (making total of 8 folds), re-cover, and return to oven until doubled in volume, about 45 minutes.
  7. Whisk filling ingredients together until well combined. Set aside. Grease a loaf pan.
  8. Transfer dough to lightly floured surface. Pat into a 6 x 11 inch rectangle. With short side facing you, fold long sides in like a business letter to form a 3 x 11 inch rectangle. Roll dough away from you into a ball. Dust with flour and flatten with rolling pin into 7 x 18 inch rectangle with 1/4 inch thickness.
  9. Using a spray bottle, spray dough lightly with water. Sprinkle half of filling mixture evenly over dough, leaving 1/4 inch border on 18 inch sides and 3/4 inch border on 7 inch sides. Spray filling lightly with water. With short side facing you, roll dough away from you into a firm cylinder. Turn loaf seam side up and pinch closed, then pinch ends closed. Dust loaf lightly on all side with flour and let rest for 10 minutes.
  10. Cut loaf in half lengthwise and turn halves so cut sides are facing up. Gently stretch each half into 14 inch length. Line up pieces of dough and pinch 2 ends of strips together. Take the piece on the left and lay over the piece on the right. Repeat, keeping cut side up, until pieces of dough are tightly twisted. Pinch ends together.
  11. Transfer loaf, cut side up, to prepared loaf pan; pushing any exposed raising into the seams. Cover loosely with plastic, return to oven, and allow to rise for 45 minutes.
  12. Remove loaf and water pan from oven. Heat oven to 350 degrees. Allow to rise at room temperature until almost doubled in size, about 45 minutes longer. The top of the loaf should rise about 1 inch over lip of pan.
  13. Brush loaf with egg mixture. Bake until crust is well browned, about 25 minutes. Reduce oven temperature to 325 degrees, tent loaf with aluminum foil, and continue to bake about 20 minutes more (until internal temperature reaches 200 degrees).
  14. Transfer pan to wire rack and let cool for 5 minutes. Remove loaf from pan, return to rack, and cool to room temperature before slicing, about 2 hours.

April 02, 2014

Chicken Liver Pate

No comments:
Yum
The onion could be doubled, increasing the deliciousness. Otherwise, keep as is.


Chicken Liver Pate

Ingredients
  • 1 lb chicken livers, cleaned
  • 1/2-1 stick cold, unsalted butter, cut into pieces
  • 1 onion, chopped
  • 4 garlic cloves, minced
  • 2 tablespoons capers
  • 2 bay leaves
  • 1/2 teaspoon dried thyme
  • 1/2 teaspoon salt
  • 1/2 teaspoon pepper
  • 1/4 cup whiskey, cognac, or brandy
Cooking Directions
  1. In a large pan, melt 1/2 stick of the butter over medium-high heat. Add the onions and cook, stirring, until soft, about 3 minutes. Add the garlic and cook for about 30 seconds. Add the chicken livers, 1 tablespoon of capers, the bay leaves, thyme, salt, and pepper, and cook, stirring, until the livers are browned on the outside and still slightly pink on the inside, about 5 minutes.
  2. Add the whiskey and cook until most of the liquid is evaporated and the livers are cooked but still tender.
  3. Remove from the heat and let cool slightly. Take out the bay leaves.
  4. In a food processor, puree the liver mixture. If desired, add the remaining butter in pieces and blend. Add the other 1 tablespoon of capers. Adjust the seasoning to taste.
  5. Pack the pate into a bowl. Cover with plastic and refrigerate until firm, at least 6 hours.

February 05, 2014

Fluffy Soft Dinner Rolls

No comments:
Yum
Deliciously soft and fluffy dinner rolls. Very easy, and what little effort there is is totally worth it. They're also small enough so that you don't need to feel guilty at all about them. Enjoy!

Fluffy Soft Dinner Rolls

Yield: 24-30 rolls
Ingredients
  • 1 package active dry yeast
  • 1 cup warm water
  • 1/2 cup sugar
  • 1 egg, beaten
  • 2 teaspoons salt
  • 1 cup milk, scalded but cooled to warm
  • 6 ounces butter, melted
  • 5 cups all-purpose flour
Cooking Directions
  1. In a standing mixing bowl with dough hook, dissolve yeast in warm water. Let sit until lightly foamy, then stir in sugar.
  2. Mix in egg, salt, warm milk, and 4 ounces of melted butter.
  3. Slowly add 5 cups flour, adding more as needed to make an elastic dough. Knead for 5 minutes.
  4. Place dough in buttered bowl, cover with towel, and set in a warm place to rise until double in bulk, about 1 hour.
  5. Lightly oil a muffin pan. Punch down dough and form dough into 1-inch balls. Place 3 balls in each muffin tin. Fill muffin pan, cover with towel, and allow to rise an additional 1/2 hour.
  6. Preheat oven to 425 degrees F.
  7. Brush with the remaining melted butter. Bake for 10 to 15 minutes, until golden brown.

January 22, 2014

Homemade Mushroom Stuffing

No comments:
Yum
If you ever wanted to make your own stuffing (or dressing) instead of buying that boxed stuff, this is as easy as it gets. Enjoy!


Homemade Mushroom Stuffing

Yield: 10 servings
Ingredients
  • 4 tablespoons butter
  • 1 onion, chopped
  • 3 celery stalks, sliced
  • 1/2 pound mushrooms, sliced
  • 1/2 teaspoon kosher salt
  • 1 teaspoon dried thyme
  • 10 cups dried breads cubes (1 inch)
  • 1 cup water or broth
  • 1 teaspoon dried parsley
Cooking Directions
  1. Melt butter in a large pan. Saute onions and celery on medium heat until onions are translucent.
  2. Add mushrooms, salt, and thyme for 5 minutes.
  3. Turn off heat. Add bread cubes and gently stir them into the mushroom mixture.
  4. Slowly pour water or broth over the bread cubes folding everything carefully so the bread cubes do not break apart too much.
  5. Preheat oven to 350 degrees F.
  6. Scoop stuffing into a medium casserole dish and bake uncovered for 40 minutes or until nice and toasty on top.

December 27, 2013

Turkey Croquettes

No comments:
Yum
What do you do with those turkey leftovers? Make croquettes, of course!

Simple and nice and crispy, you'll enjoy the texture and much as the taste. They reheat well in a toaster oven as well. Enjoy!


Turkey Croquettes

Yield: 20-22 croquettes
Ingredients
  • 1 tablespoon unsalted butter
  • 1 medium onion, minced
  • course salt and freshly ground pepper
  • 1 teaspoon dried thyme
  • 2 cups finely chopped cooked turkey
  • 1/8 cup milk
  • 1 cup mashed potatoes
  • 1/4 cup all-purpose flour
  • 1 egg, beaten
  • 1 1/2 cups bread crumbs
  • canola oil
Cooking Directions
  1. Melt butter in a large skillet over medium-high heat. Add onion, 1/2 teaspoon salt, and 1/2 teaspoon pepper. Cook for 3 minutes. Stir in thyme, and cook for 1 minute. Stir in turkey, then milk, and cook until liquid evaporates, about 30 seconds. Transfer to a large bowl, and let cool for 10-15 minutes.
  2. Add potatoes, flour, and egg to turkey, and season with 1/4 teaspoon salt and 1/4 teaspoon pepper.
  3. Form 2 tablespoons turkey mixture into balls and drop into a shallow bowl of breadcrumbs, turn to coat, and pat into 2-inch disks. Arrange in a single layer on a baking sheet, and refrigerate for 10 minutes.
  4. Heat a very shallow layer (sheen) of oil in a skillet over medium heat. Working in batches, cook croquettes in a single layer until golden brown, about 2 minutes per side. Transfer to paper towels to drain. Pat tops with more paper towels.
Modified from Martha Stewart.

September 25, 2013

Roasted Chicken on a Bed of Roots Vegetables

No comments:
Yum
A larger chicken can be used. Just adjust the cooking time. Also, various other root vegetables would be perfect. More delicate vegetables can be added later in the cooking time as well. In addition, I would suggest cutting the oil and butter down if you prefer less oily vegetables. Enjoy!


Roasted Chicken on a Bed of Roots Vegetables

5 stars
Yield: 4 servings
Ingredients
  • 1 4 to 4.5 lb whole chicken
  • kosher salt and freshly ground black pepper
  • 6 garlic cloves, smashed and peeled
  • 6 thyme sprigs
  • 2 large leeks
  • 3 tennis-ball-sized rutabagas
  • 2 tennis-ball-sized turnips
  • 4 medium carrots, peeled and cut in half
  • 1 small onion, cut into quarters
  • 8 golf-ball-sized red potatoes
  • 1/3 cup canola oil
  • 4 tablespoons unsalted butter, room temp
Cooking Directions
  1. Let chicken stand at room temperature for 1.5-2 hours.
  2. Remove innards. Generously season cavity with salt and pepper, add 3 cloves of garlic and 5 sprigs of thyme and massage the inside. Truss the chicken.
  3. Cut off the dark green leaves from the top of the leeks. Trim off and discard any darkened outer layers. Cut the leeks and rinse well.
  4. Cut off both ends of the rutabagas, then cut off the skin. Cut into 3/4 inch wedges. Repeat with the turnips.
  5. Combine all the vegetables and remaining garlic and thyme in a large bowl. Toss with 1/4 cup canola oil and season with salt and pepper. Spread the vegetables in a large cast iron or roasting pan.
  6. Preheat oven to 475 degrees.
  7. Rub the remaining oil all over the chicken. Season generously with salt and pepper.
  8. Make a nest in the center of the vegetables and rest the chicken in it.
  9. Cut the butter into 4 or 5 pieces and place over the chicken breast.
  10. Put the pan into the oven and roast for 25 minutes. Reduce the heat to 400 and roast for another 45 minutes or until the thighs and under the breast are 160 degrees and the juice runs clear. Add 5 more minutes if needed.
  11. Transfer the chicken to a carving board and let rest for 20 minutes.
  12. Just before serving, reheat the vegetables over medium heat on the stove, turning an glazing them in the juices.
  13. Cut the chicken into serving pieces, arrange over the vegetables, and serve.

July 31, 2013

Baklava

No comments:
Yum


Baklava, that super treat that goes for a crazy amount per piece. Well, you can probably get half this dish (well, close enough) for the same price by making it at home. Super easy, simple, and exceedingly delicious. Guests will rave for days about it. Enjoy!

Baklava

Yield: a whole lot of baklava!
Calories per serving: you don't wanna know
Ingredients
  • 1 cup sugar
  • 1 cup honey
  • 3/4 cup water
  • 1 tablespoon lemon juice
  • 2 teaspoons cinnamon
  • pinch cloves
  • 1 pound walnuts, or mix of any nut
  • 1 teaspoon cinnamon
  • 1/4 teaspoon salt
  • 1 stick unsalted butter
  • 1 pound phyllo dough, thawed
Cooking Directions
  1. Combine the sugar, honey, water, lemon juice, 2 teaspoons of cinnamon, and cloves in a medium saucepan. Cook over medium heat, stirring occasionally with a wooden spoon, until the sugar has dissolved. Reduce the heat to medium-low and cook until the syrup is slightly thickened, about 10 minutes. Let cool.
  2. Finely chop the nuts or pulse in a food processor. In a medium mixing bowl, combine the nuts, 1 teaspoon cinnamon, and salt and stir well to combine.
  3. Melt the butter.
  4. Using a pastry brush, lightly coat a 13 by 9-inch or 15 by 10-inch baking dish with some of the melted butter.
  5. Open the package of thawed phyllo and lay the thin sheets on a clean work surface. Measure the phyllo sheets; if the type you have purchased measures approximately the same size as the baking dish you are using, then proceed from here. If they are larger than your baking dish, use a sharp knife to cut the phyllo sheets approximately the same size as your baking dish. Keep any scraps for another use. Cover the sheets with a piece of plastic wrap and a lightly damp kitchen towel, as the sheets of phyllo dry out very quickly if left uncovered.
  6. Position rack in center of oven and preheat the oven to 350 degrees F.
  7. Place 1 of the sheets of phyllo in the bottom of the buttered baking dish and lightly brush with some of the melted butter. Repeat this procedure with 6 more sheets of phyllo, for a total of 7 layers. Measure about 3/4 cup of the nut mixture and spread the nut mixture evenly over the buttered phyllo sheets. Repeat with 7 more sheets of phyllo, buttering each layer as before, and top these sheets with another 3/4 cup of the nut mixture. Continue this layering process, buttering 7 sheets of phyllo and topping each 7 sheets with 3/4 cup of the nuts, until you have used all of the nut mixture. Layer any remaining sheets of phyllo on top, buttering between each layer, until all of the phyllo sheets have been used.
  8. Use a sharp knife to make 4 cuts lengthwise through the layered phyllo at 1 1/2 inch intervals. (You should end up with 5 lengthwise strips 1 1/2 inches wide.) Now use your knife to cut diagonally across the strips at 1 1/2-inch intervals to form diamond shapes. You should end up with approximately 36 diamond-shaped pieces of baklava in the baking dish.
  9. Bake the baklava until golden brown, about 40 minutes.
  10. Using oven mitts or pot holders, remove the baklava from the oven and set aside on a wire rack to cool for 5 minutes. Using a ladle or small measuring cup, slowly drizzle the cooled syrup over the warm baklava. Allow to stand several hours before serving.
  11. Adapted from Emeril.

April 24, 2013

Vegetarian Moussaka with Sweet Potatoes

No comments:
Yum

A vegetarian version of our original Moussaka. Instead of meat, we chose portobello for its meaty qualities. Plus, how can you not love portobello and eggplant together in one dish? This one also includes a layer of sweet potatoes on the bottom that really goes nicely with the cinnamon and nutmeg spices used throughout the dish.


Moussaka

Yield: 8-12 servings
Ingredients
  • 3 eggplants, peeled and cut into half-inch slices
  • 1 sweet potato, cut into 1/4 inch slices
  • salt
  • 1/4 cup olive oil
  • 1 tablespoon butter
  • 1 pound portobello mushrooms, cut into 1/2 inch pieces
  • salt, to taste
  • black pepper, to taste
  • 2 onions, chopped
  • 1 clove garlic, minced
  • 1/4 teaspoon cinnamon
  • 1/4 teaspoon nutmeg
  • 1/2 teaspoon Italian herbs
  • 2 tablespoons dried parsley
  • 1 8-ounce can tomato sauce
  • 1/2 cup red wine
  • 1 egg, beaten
  • 4 cups milk
  • 1/2 cup butter
  • 6 tablespoons flour
  • salt, to taste
  • white pepper, to taste
  • 1.5-3 cups parmesan, grated
  • 1/4 teaspoon nutmeg
Cooking Directions
  1. Lay the slices of eggplant on paper towels, sprinkle lightly with salt, and set aside for 30 minutes to draw out the moisture. Then in a skillet over high heat, heat the olive oil. Quickly fry the eggplant until browned. Set aside on paper towels to drain.
  2. In a large skillet over medium heat, melt the butter and add the portobello, salt and pepper to taste, onions, and garlic. After the mushrooms have lost some of their liquid, sprinkle in the cinnamon, nutmeg, herbs and parsley. Pour in the tomato sauce and wine, and mix well. Simmer for 20 minutes. Allow to cool, and then stir in beaten egg.
  3. To make the bechamel sauce, begin by heating the milk to about boiling. Melt the butter in a large skillet over medium heat. Whisk in flour until smooth. Remove from heat and gradually pour in the hot milk, whisking constantly until it thickens. Season with salt, and white pepper.
  4. Arrange a layer of sweet potato as shingles, then a layer of eggplant in a greased 9x13 inch baking dish. Cover eggplant with all of the portobello mixture. Cover with remaining eggplant. Pour the bechamel sauce over the top, and sprinkle with the nutmeg.
  5. Bake for 1 hour at 350 degrees F (175 degrees C).

February 27, 2013

Strawberry Summer Cake

No comments:
Yum

This is a delicious cake, perfect for the summer months when all we want to do is eat strawberries. It is light and goes well after a summer dinner. The addition of barley flour makes it even lighter and smoother. Don't worry if you don't have any though; it works just fine without.


If you have a regular pie pan, this will work fine. If you have a larger one or a deep dish one, either double or 1.5 times the recipe. Extra springiness! Enjoy!

Adapted from Smitten Kitchen.


Strawberry Summer Cake

Yield: 1 cake
Ingredients
  • 6 tablespoons (85 grams) unsalted butter, room temperature
  • 1.5 cups (188 grams) all-purpose flour (can swap half with barley flour)
  • 1.5 teaspoon baking powder
  • 1/2 teaspoon salt
  • 3/4 cup sugar
  • 2 tablespoons sugar
  • 1 egg
  • 1/2 cup milk
  • 1 teaspoon vanilla extract
  • 1 pound strawberries, halved
Cooking Directions
  1. Preheat oven to 350 degrees. Butter a pie pan.
  2. Whisk flour or flours, baking powder, and salt together in a small bowl.
  3. In a larger bowl, beat butter and 3/4 cup sugar until pale and fluffy with an electric mixer, about 3 minutes. Mix in egg, milk, and vanilla until just combined.
  4. Add dry mixture gradually, mixing until just smooth.
  5. Pour into prepared pie plate. Arrange strawberries on top of batter, as closely as possible in a single layer. Sprinkle remaining 2 tablespoons sugar over the strawberries.
  6. Bake cake for 10 minutes then reduce oven temperature to 325 degrees and bake cake until golden brown and a tester comes out free of wet batter, about 50 to 60 minutes.
  7. Let cool in pan on a rack.

August 27, 2012

Pear Gruyere Pie

No comments:
Yum

Remember the TV show called Pushing Daisies? One of TV's biggest regrets is losing that show. The vivid color and vibrant fantasies that passed by on the screen was a highlight in entertainment.


In remembrance, or just because I've always wanted to make one of the delicious pies they're constantly baking and eating (they do work at The Pie Hole after all), the Pear Gruyere Pie was born - completely and utterly inspired by Chuck, who bakes the Gruyere into the crust. Enjoy!


Pear Gruyere Pie

Yield: 1 pie
Ingredients
  • Gruyere Crust
  • 2 1/2 cups all-purpose flour
  • 2 teaspoon salt
  • 2 sticks unsalted butter
  • 1/3 cup ice water
  • 1/2 cup shredded Gruyere cheese
  • Pear Filling
  • 1/4 cup brown sugar
  • 1/4 cup white sugar
  • 3 tablespoons all-purpose flour
  • 1/4 teaspoon salt
  • 1 teaspoon ground cinnamon
  • 1/4 teaspoon nutmeg
  • 5 cups pear, peeled and sliced
  • 1 tablespoon unsalted butter
  • 1 tablespoon lemon juice
Cooking Directions
  1. Combine the flour and salt in a bowl. Dice the butter into 1/4 inch pieces. Place butter and the flour in a large zip lock bag, seal and roll over with a rolling pin until the butter is combined. Place the bag in the freezer for at least 30 minutes.
  2. Pour the ingredients from the bag into a chilled mixing bowl and work together with a fork until the mixture becomes pebbly. Gradually drizzle the ice water over the mixture, blending with the fork. Add more water if necessary add a tablespoon at a time, until you achieve the right consistency.
  3. Form two discs out of the dough, working each in your palm. Wrap them each tightly with saran wrap and refrigerate.
  4. Combine sugar, flour, salt, cinnamon, and nutmeg in mixing bowl.
  5. Arrange pears in layers in a 9 inch pan on top of one of the crusts, sprinkling sugar mixture over each layer. Dot with butter. Sprinkle with lemon juice. Roll out remaining dough; cut slits for escape of steam. Moisten rim of bottom crust. Place top crust over filling. Fold edge under bottom crust, crimping to seal.
  6. Bake at 450 degrees F (230 degrees C) for 10 minutes. Sprinkle Gruyere over the top. Reduce temperature to 350 degrees F (175 degrees C), and bake for an additional 35 to 40 minutes.

May 22, 2012

Cinnamon Raisin Swirl Bread

No comments:
Yum

A lovely Cinnamon Raisin Swirl Bread is the perfect way to lighten up your day.

With soft swirls of cinnamon, a light and springy interior, and raisins throughout, what more could you ask for?

The absolute true beauty of this is that it's not sugared down. You can taste the subtleties of the different ingredients, which compliments a nice spot of tea. Use in your own Croatian Easter Breakfast or any which way. Enjoy!
Yields 1 loaf

Ingredients

1/2 cups milk
1/3 cup warm water
1 package active dry yeast
1 egg
1/6 cup white sugar
1/3 teaspoon salt
1/6 cup butter, softened
1/2 cup raisins
2 2/3 cups all-purpose flour
1/4 cup white sugar
2 tablespoons ground cinnamon

Directions

1. Let milk warm to room temp.

2. Dissolve yeast in warm water, and set aside until yeast is frothy. Mix in eggs, sugar, butter or margarine, salt, and raisins. Stir in milk. Add the flour gradually to make a stiff dough.

3. Knead dough on a lightly floured surface for a few minutes. Place in a large, greased mixing bowl, and turn to grease the surface of the dough. Cover with a damp cloth. Allow to rise until doubled.

4. Roll out on a lightly floured surface into a large rectangle 1/2 inch thick. Moisten dough with 2 tablespoons water. Mix together 1/4 cup sugar and 2 tablespoons cinnamon, and sprinkle mixture on top of the moistened dough. roll up tightly; the Roll should be about 3 inches in diameter. Tuck under ends and place loaf into well greased 9 x 5 inch loaf pan. Lightly grease tops of loaf. Let rise again for 1 hour.

5. Bake at 350 degrees F (175 degrees C) for 35 minutes, or until loaf is lightly browned and sounds hollow. Remove loaf from pan. Let cool before slicing.

April 26, 2012

Blackened Catfish Po'Boy

No comments:
Yum

Blackened Catfish Po'Boys are simply amazing. I mean first of all, catfish is amazing. Second of all, po'boys are amazing. And third of all, it's all amazing together!

Simple, easy, carefree. I'm in! A bit of arugula on top and voila. Yum.


Ingredients

2 teaspoons cayenne pepper
2 teaspoons lemon pepper
2 teaspoons garlic powder
2 teaspoons salt
2 teaspoons pepper
1 pound catfish fillets
2 tablespoons butter
1 cup arugula
1 baguette, sliced into 6 inch sections

Directions

Preheat oven to 350 degrees F (175 degrees C). Lightly grease a medium baking dish.

In a shallow, medium bowl, mix cayenne pepper, lemon pepper, garlic powder, salt and pepper.

Brush both sides of catfish fillets with butter. Rub fillets with the cayenne pepper mixture on both sides.

Heat a large heavy skillet over medium-high heat until really hot. Add fillets, and fry approximately 2 minutes on each side, until slightly blackened.

Arrange blackened fillets in a single layer in the prepared baking dish. Bake 30 to 35 minutes in the preheated oven, until fish is easily flaked with a fork.

April 06, 2012

Cinnamon Raisin Swirl Bread

No comments:
Yum

A lovely Cinnamon Raisin Swirl Bread is the perfect way to lighten up your day.


With soft swirls of cinnamon, a light and springy interior, and raisins throughout, what more could you ask for?


The absolute true beauty of this is that it's not sugared down. You can taste the subtleties of the different ingredients, which compliments a nice spot of tea. Use in your own Croatian Easter Breakfast or any which way. Enjoy!

August 15, 2011

Burger Buns

2 comments:
Yum

There's something truly satisfying about making things from scratch. Things just seem to taste better and you're happier with the results. Such is the case for these burger buns.


They may feel heavy and dense in your hand, but cut them open and splay your burger upon it, and you will realize these are the perfect burger buns. They do exactly what you would want a bun to do, AND they taste amazing. Enjoy!