Showing posts with label beans. Show all posts

December 04, 2015

Pressure Cooker Split Pea Soup

No comments:
Yum
A delicious recipe for a vegetarian split pea soup made in a pressure cooker. Simple, quick, and effective. Just how I like it. Enjoy!


Pressure Cooker Split Pea Soup

Yield: 6-8 servings
Ingredients
  • 1 lb split peas, soaked and rinsed
  • 1 medium onion, diced
  • 1 celery, diced
  • OR 1 tablespoon dried celery leaf
  • 1 tablespoon oil
  • 2 bay leaves
  • 1 teaspoon salt
  • 6 cups water
Cooking Directions
  1. Add everything to the pressure cooker. Mix well.
  2. Close and lock the lid.
  3. Cook on high pressure for 5 minutes.
  4. Let cool via the natural release method off the burner.
  5. Open the pressure cooker, remove the bay leaves, mix, and serve.

January 16, 2015

Baked Sprouted Falafel

No comments:
Yum
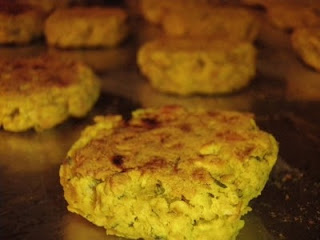
This falafel is extremely easy. All you need is a food processor to make the falafel dough and you're all set. Even better, they're baked and still get a crispy crust on the outside. Enjoy with your favorite sauces, hummus, whatnot. The only thing you really have to prep for in the sprouting, but that super easy. Make them bigger ro smaller too. Experiment and go crazy. I'd like to see one giant falafel. Enjoy!


The Easiest Gluten-free Sprouted Baked Falafel

Yield: 6-8 servings
Ingredients
  • 1 cup dried chickpeas
  • 1 garlic clove, chopped
  • 1/2 onion, quartered
  • 1 teaspoon cumin
  • 1/2 teaspoon cayenne pepper
  • 1/2 cup fresh parsley
  • 1/2 teaspoon salt
  • 1/4 teaspoon baking soda
  • 1/2 tablespoon lemon juice
  • 2 tablespoons olive oil

October 08, 2014

Homemade Tofu

No comments:
Yum
Tofu is very easy to make at home. It takes a little time, and a little more hands-on time than Tempeh, but it's worth it. Normally, you need fancy ingredients to coagulate the tofu, but here we have a method using citric acid, which you might have around if you make cheese. Since it does use citric acid, it might be a little more tangy than you're used to. It pairs nicely with soy sauce and garlic. Enjoy!


Homemade Tofu

Yield: 4 servings
Ingredients
  • 200 g soy beans
  • 1/2 teaspoon citric acid
  • water
Cooking Directions
  1. Soak the beans for at least 8 hours.
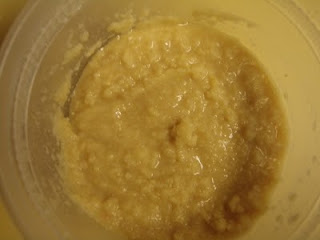
  2. In a food processor, grind the soaked soy to a fine paste, like hummus almost. Add water if needed.
  3. In a large pot add enough water to the paste to bring it to milk consistency.
  4. Bring it to boil then switch to a simmer. Let it simmer on low flame for 15 minutes.
  5. Line a sieve with a cloth and filter the milk. The result is soy milk. The byproduct after filtering the milk is called okara. This is rich in protein.
  6. Mix citric acid to 1/4 cup water. Add this solution to the soy milk and stir it once. Then let it stay for 5 minutes.
  7. The milk will curdle. Filter this through a cloth-lined sieve.
  8. Squeeze out the water or keep the filtered tofu on a flat surface and cover it with the cloth on all the sides. Keep some heavy object on top and leave it for 30 minutes or to desired firmness.
  9. Remove weight and open the cloth. Cut it into small pieces and use.

April 30, 2014

Chili with Beer

No comments:
Yum
Some might call this boilermaker chili. Some might call it tailgate chili. Those two names conjure up different meanings for me, especially concerning their list of ingredients, so I simply named this chili with beer.

Like all tomato sauces, this is better as leftovers, though still incredible the day of. The longer it simmers, the better it'll be too. Enjoy!

Chili with Beer

Yield: 8 servings
Ingredients
  • 1.5 pounds ground meat (can be anything with or without sausage)
  • 1/2 pound dried beans, soaked overnight, sprouted if desired
  • 1 28 oz can diced tomatoes with juice
  • 1/2 6 oz can tomato paste
  • 1 onion, chopped
  • 2 celery stalks, sliced
  • 1 carrot, sliced
  • 1 green bell pepper, seeded and chopped
  • 1 red bell pepper, seeded and chopped
  • 2 small cubes of beef bouillon
  • 1/2 cup beer
  • 2 tablespoons chili powder
  • 1.5 teaspoons Worcestershire sauce
  • 1.5 teaspoons garlic, minced
  • 1.5 teaspoons dried oregano
  • 1 teaspoon cumin
  • 1 teaspoon hot sauce
  • 1/2 teaspoon dried basil
  • 1/2 teaspoon black pepper
  • 1/2 teaspoon cayenne pepper
  • 1/2 teaspoon paprika
  • 1/4 teaspoon salt
Cooking Directions
  1. Heat a large pot over medium-high heat. Cook and crumble the ground meat into the hot pan until evenly browned. Drain off fat.
  2. Stir in the soaked beans, diced tomatoes, and tomato paste.
  3. Stir in the onion, celery, green and red bell peppers, bouillon, and beer.
  4. Stir in chili powder, Worcestershire sauce, garlic, oregano, cumin, hot sauce, basil, black pepper, cayenne, paprika, and salt.
  5. Stir together, then cover and simmer over low heat for at least 2 hours, stirring occasionally.
  6. After 2 hours, taste and adjust salt, pepper, and chili powder as desired. The longer it cooks, the better it'll taste. It'll also get better when refrigerated like most tomato sauce-based dishes.

January 13, 2014

Homemade Tempeh

No comments:
Yum
It is incredibly easy to make your own tempeh at home. There are dozens of sites out there that will show you how, with this being the most basic and least expensive way. You will have to order some tempeh starter for yourself, however. That said, you can use any kind of bean you want! The real trick is keeping it incubated at the right temperature, but it's not that difficult. Enjoy!


Homemade Tempeh

Yield: 10 servings
Ingredients
  • 1 lb beans
  • 1.5 tablespoons white vinegar
  • 1 teaspoon tempeh starter
Cooking Directions
  1. Soak beans overnight (or for 8-12 hours).
  2. Cook them until soft but still firm (slightly under done).
  3. Strain liquid and let cool. Make sure the beans are dry. If necessary, heat in a pot on the stove, stirring constantly. Then let it cool.
  4. Mash beans or place in food processor, leaving some whole beans remaining.
  5. Add vinegar and mix.
  6. Add tempeh starter and mix thoroughly.
  7. Place into a baking dish or plastic bag with holes poked in it.
  8. Spread evenly and pack it down tight.
  9. Place a piece of aluminum foil on top of dish, if using. Poke a number of fork holes in the foil.
  10. Find a place to incubate for 24 hours, between 85-90 degrees. I place mine in the oven, occasionally turning on the heat for a few seconds. This can also take up to 48 hours.
To cook the tempeh, either steam it then marinate and saute or just saute. If the tempeh is particularly dry, steam it for 5 to 15 minutes first, to desired softness. The marinade recipe is below. Let marinate for at least 15 minutes.

1/5th of the batch of tempeh
2 tablespoons oil, either canola, sesame, or a mix
2 tablespoons soy sauce
1 tablespoon lemon juice or 1/2 tablespoon vinegar
2 cloves garlic, diced
optional: 2 tablespoons fresh ginger, diced

November 06, 2013

Crispy Baked Falafel

No comments:
Yum


Crispy Baked Falafel

Yield: 12-24 falafels
Ingredients
  • 3 tablespoons olive oil
  • 1/2 cup dried chickpeas, soaked overnight
  • 1 green onion
  • 1/4-1/2 cup fresh parsley
  • 2 garlic cloves
  • 1/8 teaspoon cumin
  • pinch cinnamon
  • 1/2 teaspoon kosher salt
  • 1/4 teaspoon black pepper
Cooking Directions
  1. Preheat oven to 375 F with rack in the center. Coat a baking sheet with 1 to 2 tablespoons olive oil.
  2. In a food processor, combine the soaked, drained, and rinsed chickpeas, green onion, parsley, 1 tablespoon olive oil, garlic, cumin, cinnamon, salt, and pepper. Process until smooth.
  3. Scoop out about 1-2 tablespoons (depending on how big you'd like them) of the mixture at a time. Shape the falafel into small patties, about 1/2 inch thick. Place each falafel on your oiled sheet.
  4. Bake for 12 minutes, then remove the falafel from the oven and carefully flip each one. Return the pans to the oven for another 12 to 13 minutes, until the falafels are lightly browned on both sides.

Adapted from America's Test Kitchen

January 17, 2012

Smoky Refried Beans

No comments:
Yum

I don't know if any refried beans could be simpler. The addition of smoked paprika really adds another element of flavor that you won't likely find anywhere else. Enjoy!

Ingredients

2 cups cooked into beans
1/4 cup water
salt, pepper, smoked paprika, to taste

Directions

1. In a medium pot on medium heat, mash beans and water together until they are the desired consistency.
2. Add seasonings to taste, and cook until desired consistency. Beans will become more firm and dry as they sit, so use immediately.

November 07, 2011

BBQ Country-Style Pork Spareribs

1 comment:
Yum

This is perhaps about the easiest recipe ever for pork spareribs. Really, I don't think it could get any simpler. In fact, it's so simple I think I'll just cut right to it. Enjoy!


Ingredients

country-style pork spareribs
your favorite BBQ sauce

Directions

Preheat oven to 250. Place spareribs in shallow baking pan and bake for 2 hours. Reduce heat to 200, cover ribs with just BBQ sauce so it coats it, and bake again for another 45 minutes to an hour. Sauce with more BBQ if desired.

Serve with a side of beans and veggies.

June 15, 2011

Spent Grain Veggie Burger

2 comments:
Yum

The same spent grains that were used to make the Liquid Oatmeal Cookie (Oatmeal Stout), the Spent Grain Bread, and the Spent Grain Muffins, are now being used in their greatest concoction yet - Spent Grain Veggie Burgers.


With the help of black beans and the flavors of soy sauce, garlic, and cumin, the most unique homemade veggie burger is born!

The ease with which this recipe comes together is so simple and only adds to the joy of savoring every bite. Enjoy!

Spent Grain Veggie Burger

Yield: 4 burgers
Ingredients
  • 1/2 cup chopped onion, divided into two
  • 1/2 cup spent grain, wet
  • 1 1/2 cups black beans, rinsed and drained
  • 1 tablespoon soy sauce
  • 2 cloves garlic, chopped
  • 3/4 teaspoon cumin
  • 1/4 teaspoon salt
  • 1/2 teaspoon pepper
Cooking Directions
  1. Cook half of onion with a dash of salt in a splash of water in a small pan over medium heat, stirring occasionally, until golden, 5 to 7 minutes. Add spent grain and cook, covered, over low heat 5 to 8 minutes. Transfer to a bowl and stir in beans and soy sauce.
  2. Mash or food process spent grain mixture mixture, garlic, cumin, salt, pepper, and remaining onion until finely chopped.
  3. Form rounded 1/2 cups of mixture into 4 (3 1/2-inch-diameter) patties. Chill at least 10 minutes.
  4. Spray oil in a heavy skillet over medium heat, then cook patties, carefully turning once, about 8 minutes total.

May 31, 2011

Disney's Tuscan Salad

No comments:
Yum
Tuscan Salad

Wine Country Trattoria

Yields 1 serving

Handful of mixed greens or mesclun mix
1 oz. black sliced olives
1 oz. diced red bell peppers
1 oz. diced celery
1 oz. white beans
2 ea. sliced beets (not pickled)
2 ea. whole pepperoncinis
3 ea. tomato wedges

Top with grated mozzarella, a few pieces of sliced salami and croutons. Guests are given a choice of 4 dressings - Italian, Blue Cheese, Ranch or Oil & Vinegar - and all are commercial dressings.

Disney's Touchdown Tacos

No comments:
Yum
Touchdown Tacos

Mission Tortilla Factory

Serves 10

Ingredients

10 Mission® Soft Taco Size Flour Tortillas warmed
10 Mission® Taco Shells
1 lb. Ground Beef
2/3 cup Water
1 can Refried Beans warmed
Toppings: Salsa to taste, shredded Lettuce, shredded Cheese, diced Tomatoes
2 pkg. Lawry's Taco Spices and Seasonings

Directions

Follow directions on 1st package of Lawry's Taco Spices to prepare meat.

Add 2nd package of seasonings to refried beans.

Spread warmed beans across each warmed tortilla. Place a taco shell in center of each tortilla and fold around to seal.

Fill taco shell with seasoned meat & toppings.

April 14, 2011

Italian 3 Bean Salad

No comments:
Yum

3 Bean Salad is delicious. A staple of picnics and potlucks, it can be a satisfying side because of the high amount of protein and fiber - it's just chock full of the stuff!


It can be quick and easy too if you're using canned beans, though I like to go a more wholesome route and do it with dried beans from scratch. There's something about the aroma of a pot of beans that I love.

So pack a picnic basket full of this and a sandwich (plus maybe a bottle of wine) for a lovely day out. Enjoy!

February 07, 2011

Baked Falafel Patties

No comments:
Yum

In California, I had only known them as garbanzo beans. Apparently, that's not how it's done on the east coast. Chickpeas are the way to go. Personally, I still prefer garbanzo beans. Garbanzo just sounds so cool. Garbanzo!


There was still some garbanzos left over after all the hummus, and what's the second most popular garbanzo bean dish in the middle east? You guessed it - falafel!

The great thing about falafel is that it can be seasoned however you want. And it doesn't have to be fried. That's a huge bonus in my book.


They come out crispy on the outside, soft and moist on the inside. Perfect. Throw it in a pita, add some hummus and veggies, maybe some yogurt sauce, and you're good to go. Or do like we did and pair it with the Homemade Mozzarella and some roasted potatoes. Enjoy!

January 24, 2011

Healthy Hummus

No comments:
Yum
Garlic Hummus

Who doesn't love hummus? Recently, I've seen some pretty wild ones out there. Like dessert hummus, for instance. Pumpkin, maple, caramel. Then there are peanut butter and the more traditional savory ones. It seems you're only limited by your imagination here.

Cajun Hummus


But how to keep the hummus healthy without adding tahini or oil? Easy! These two versions of tahini-free and oil-free hummus are delicious.

It especially helps if you have a food processor. I love that little thing. Enjoy!

October 26, 2010

Mexican Rice, Spiced Black Beans, and Turmeric Corn

1 comment:
Yum

I really liked how simple each of these dishes are to make. If I was just making one of them, it would almost be too easy! When all three are going though, there's a lot to be done.


They're great dishes. The beauty is that each could be a side to something bigger, say enchiladas or chilaquiles. Or each could be combined with the others and then you'd have a fantastically healthy Mexican meal on your hands. You gotta love the power of beans and rice and veggies. Enjoy!

Mexican Rice, Spiced Black Beans, and Turmeric Corn

Yield: Serves 3-4
Ingredients
  • Mexican Rice

  • 1 cup white rice (long grain, if possible)
  • 2 cloves garlic (or 1/2-1 teaspoon garlic powder)
  • 1/2 onion
  • 1 can tomatoes, drained (or tomato juice)
  • oil
  • 1 teaspoon salt
  • 2 cups water (none if using tomato juice, unless necessary at the end)

  • Spiced Black Beans

  • 16 oz bag dried black beans
  • 1/4 teaspoon salt
  • 2 teaspoons cumin
  • 1 teaspoon dried celery
  • 1 teaspoon dried onion
  • 1 teaspoon garlic
  • black pepper, to taste

  • Turmeric Corn

  • 1 can corn
  • 1/5 pack assorted frozen veggies (peas, carrots, green beans)
  • 1 tablespoon turmeric
  • splash lemon juice
  • water
Cooking Directions
  1. Mexican Rice
  2. In a pan, toast the rice on medium heat until brown (but not burnt!) with the minimal amount of oil. Stir frequently!
  3. Just before it's done, toss in the onion and garlic for one to two minutes.
  4. Add everything else in the pan and stir to incorporate.
  5. Bring to a boil, then cover and simmer on low heat for about 20 minutes.
  6. Spiced Black Beans
  7. Prepare beans as directed, sifting to ensure that there are no rocks.
  8. Toss in the seasonings (except the black pepper) and cook.
  9. Add black pepper when finished cooking, if desired.

  10. Turmeric Corn
  11. Drain 1 can of corn and heat in a pan with the frozen veggies.
  12. Add the turmeric, lemon juice, and any water as needed until thoroughly heated.

October 18, 2010

Chilaquiles with Mole

2 comments:
Yum


Now if you thought the title was referring to mole, the little blind animal who burrows underground, you'd be completely wrong (gross!). If you thought it was referring to mole sauce, one of the most awesome-est sauces in the world, you're spot on! Well done, you.

For those unaware, chilaquiles are hardened tortillas (toasted or fried) with a sauce (typically salsa roja or salsa verde) with various toppings. Some common toppings include eggs, chicken, jalapenos, cheese, beans, etc. It is typically eaten for breakfast, and it's a traditional Mexican cure for hangovers (supposedly because of the spiciness). How's that for a reason to get smashed?

Today, we used the less common mole sauce. Mmm! We also used egg, chicken, olives, homemade salsa, and nopalitos (cactus).

Mole is like a really excellently spiced thick peanut butter. It's usually thinned out by adding water or stock. It packs a flavor punch to anything it touches. More on assembling your future chilaquiles below. Enjoy!

September 24, 2010

Dorayaki (Japanese Filled Pancakes)

No comments:
Yum

Japanese filled pancakes. Or as we like to call them: Dorayaki! Hehe how fun!


They're just so cute and delicious. Sweet azuki beans sandwiched between moist little pancakes. Such a treat.


Perfect for breakfast on the go, perfect for dessert, or perfect for a snack. Dorayaki! Enjoy!

Dorayaki (Japanese Filled Pancakes)

Yield: 14-28 Dorayaki
Ingredients
  • 3 large eggs
  • 8 tablespoons sugar
  • 5 tablespoons milk
  • 2 teaspoons honey
  • 180g self-rising flour
  • 1 can sweet red beans
Cooking Directions
  1. Beat eggs in a bowl and whisk it, then slowly add in sugar and continue to whisk very well.
  2. Add milk and honey in the egg mixture
  3. Add sifted flour in the egg mixture gradually until the mixture becomes smooth.
  4. Cover the mixture with plastic wrap and let it stand for 30 minutes
  5. Heat a non-stick pan on medium low heat.
  6. Pour a scoop of the batter in the pan to make it a small pancake. (I used 1 tablespoon as the scoop size)
  7. Turn over when bubbles appear on the surface (about 3 minutes) and cook the other side for 40 sec to 1 minute max. (Like a pancake!) The pancake should have 1 side with coffee color and another side with pale brown color.
  8. Place the cake on a wire rack and let it cool.
  9. To assemble the Dorayaki, look for 2 pieces with about the same shape and side.
  10. Place 1 scoop of sweet red bean on the pale yellow side and cover with another cake with the same side.
**Optional: If the pancakes seem too thick to eat two of them with red bean inside, simply slice them in half (as we did with some) and fill with red bean. Voila!

Recipe courtesy of Masakan Istimewa

December 12, 2009

Crock Pot Turkey Chili

No comments:
Yum
At last we have a crock pot recipe! My family made this, oh, a few months ago now, and sadly, there are no pristine pictures of the fine goop that came out. It was hearty, healthy, and heavenly. I mean it doesn't get much easier than a crock pot, crockery, or slow cooker, right?

The beauty of this recipe is that it's very flexible. Add a ton of beans...or not. Mix it up! I just want to make one warning though - the "jar of tomatoes" should really be a jar and not a can. Canned tomatoes contain bisphenol-A, "a synthetic estrogen that has been linked to ailments ranging from reproductive problems to heart disease, diabetes, and obesity." Here you can find a few other common foods to avoid and why. Just an fyi for all of us. Enjoy!

Crock Pot Turkey Chili

Total time: 5-8 hours
Yield: Serves 4
Ingredients
  • 1 lb ground turkey
  • 1 onion
  • 2-3 kinds of beans
  • 1 large jar (28-32 oz) crushed or diced tomatoes
  • 2-3 tablespoons chili powder
  • 1/2 teaspoon salt/pepper
  • 1 medium jar (12-14 oz) tomato paste/sauce
  • 1 1/2 teaspoons olive oil
  • green chilies
  • 1-2 cups corn
  • 1/2 teaspoon various other seasonings, optional
Cooking Directions
  1. Chop onion and cook with ground turkey in pan with olive oil.
  2. Drain fat from turkey and onion and add to crock pot.
  3. Mix everything else in crock pot (optional to mash some of the beans to make thicker chili).
  4. Cook on low for 5-8 hours (crock pots vary).