Showing posts with label bread. Show all posts

May 01, 2015

Sourdough Pizza

No comments:
Yum
Here is our sourdough take on our classic Thin Crust Pizza on a pizza steel. If you like a little bit of that sourdough favor (but not a full-blown San Francisco punch), you're going to be into this. It's a little different and good in its own way. Let us know how it turned out for you. Enjoy!


Thin Crust Pizza on Steel

Yield: 3 pizzas
Ingredients
  • 205 g lukewarm water
  • 1 cup (183 g) sourdough starter
  • 1/2 tablespoon kosher salt
  • 1/8 cup olive oil
  • 345 g all-purpose flour
Cooking Directions
  1. Mix the starter, salt, and olive oil with the water in a non-airtight lidded container.
  2. Mix in the flour without kneading, using a spoon.
  3. Cover and allow to rest at room temperature until dough rises and flattens. This could take longer because of the sourdough.
  4. At this point, you can store it in the fridge for up to a week or dust the top with flour and cut into three pieces. The other pieces may be wrapped tightly with plastic wrap and stored in the freezer for several months.
  5. Preheat oven to its highest temperature and place baking steel or stone on the middle or lowest rack. Let preheat for 20-40 minutes.
  6. Shape dough into a ball by stretching the surface around to the bottom on all four sides. Do this minimally.
  7. Flatten with your hands on a well-floured surface. Get the dough to 1/8 inch thick. Use a floured rolling pin if needed. The dough will spring back some, so you may need to stretch it further than you think of stretch it again. Once stretched and relaxed, place onto a cornmeal-covered pizza peel.
  8. Place your toppings on the dough. Be minimalistic.
  9. Slide the pizza directly onto the steel or stone. Pizza may be done in as little as 4 minutes, so check to make sure it's not overcooking.
  10. Allow to cool for a minute on a rack to allow the cheese to set.

February 06, 2015

The Best Cheddar Biscuits

No comments:
Yum

Biscuits are easy to make, but don't mess with it too much. The secret to flaky and tender biscuits is all in how the butter is distributed throughout the dough. If done correctly, it'll melt and puff up the biscuits when they bake at a high temperature. This is an adaptation from America's Test Kitchen, so you know it's perfect. Enjoy!

If you don't have buttermilk, just use milk mixed with lemon juice or vinegar. Add one tablespoon of lemon juice or vinegar to a measuring cup. Fill to 1 cup with milk. Let sit 5 minutes before using.


The Best Cheddar Biscuits

Yield: 20-24 biscuits
Ingredients
  • 2 cups all-purpose flour
  • 2 teaspoons baking powder
  • 1/2 teaspoon baking soda
  • 1 teaspoon sugar
  • 3/4 teaspoon salt
  • 4 oz. cheddar cheese, grated
  • 1 cup buttermilk (or substitute)
  • 8 tablespoons butter, melted and cooled
  • 2 tablespoons butter, melted, for brushing biscuits
  • 1 garlic clove
  • 1 tablespoon fresh parsley, minced
Cooking Directions
  1. Preheat the oven to 475 degrees. Line a rimmed baking sheet with parchment paper.
  2. Melt 1 stick of butter first and set aside to cool.
  3. Whisk the flour, baking powder, baking soda, sugar, and salt in a large bowl until evenly mixed.
  4. Add the grated cheese and mix it into the dry ingredients.
  5. Pour the cold buttermilk (or substitute) into a medium bowl. Pour in the cooled, melted butter and mix it together with a whisk or a fork.
  6. Make a well in the center of the dry ingredients. Pour in the buttermilk mixture and mix the batter quickly and gently, just until the batter is moistened and comes together. Do not over-mix the batter.
  7. Use a large spoon to scoop up and portion out the batter onto the baking sheet for 20-24 biscuits.
  8. Bake the biscuits in the preheated oven for 12-14 minutes, until golden brown.
  9. While the biscuits are baking, melt the remaining 2 tablespoons of butter. Add the garlic and the minced parsley to the butter.
  10. When the biscuits are baked, brush the biscuits with the melted garlic-parsley butter.

July 09, 2014

No-Knead Artisan Bread (Whole Wheat version too)

No comments:
Yum
Here's a method without the need for a Dutch oven. Use a pan that is oven-safe, such as a cast-iron skillet. Use a metal baking dish on the bottom rack. The hot water will go into that dish when the bread goes in the oven, creating a similar steaming effect to the Dutch oven method. Voila, artisan bread! Enjoy!


No-Knead Artisan Bread

Yield: 1 large loaf
Ingredients
  • 560 g all-purpose flour (or whole wheat)
  • 1/2 teaspoon yeast
  • 2 teaspoons salt
  • 472 g water, about 70 degrees F
    •  520 g water if using 100% whole wheat
Cooking Directions if not using a Dutch oven
  1. Mix the flour, yeast, and salt in a large bowl. Add the water and stir until mixed. It will be a very sticky dough.
  2. Cover the bowl with plastic wrap or something similar. Let the dough rest for about 24-48 hours at about 70°F. It's fine if it's longer. The dough is ready when its surface is dotted with bubbles. Fold the dough once or twice during this time.
  3. Fold once or twice. Cover loosely with plastic wrap and let rest for about 15 minutes.
  4. Gently and quickly shape the dough into a ball. Leave in the bowl. If a ball does not form, don't worry about it. Cover with a towel or plastic wrap and let rise for about 2 hours. When it’s ready, the dough will be more than doubled in size.
  5. About 15-20 minutes before the dough is ready (the end of the 2 hours), heat the oven to 450°F. Put an oven-safe pan on the middle rack of the oven as it heats. Put a metal rimmed sheet or baking dish on the bottom rack as well.
  6. When the dough is ready, carefully remove the pan from the oven and turn the dough over into the pan. It won't be graceful, so just get it all in there as quickly as possible. Fill the sheet or dish on the bottom rack with 2 cups of very hot water immediately after you put the dough in the oven.
  7. Bake for 50-60 minutes, until the loaf is beautifully browned. Remove the bread and let cool on a rack.

Cooking Directions if using a Dutch oven

  1. Mix the flour, yeast, and salt in a large bowl. Add the water and stir until mixed. It will be a very sticky dough.
  2. Cover the bowl with plastic wrap or something similar. Let the dough rest for about 24-48 hours at about 70°F. It's fine if it's longer. The dough is ready when its surface is dotted with bubbles. Fold the dough once or twice during this time.
  3. Fold once or twice. Cover loosely with plastic wrap and let rest for about 15 minutes.
  4. Gently and quickly shape the dough into a ball. Put it on a piece of parchment paper. Put it back into a clean bowl if you want to keep a ball-like shape more. If a ball does not form, don't worry about it. Cover with a towel or plastic wrap and let rise for about 2 hours. When it’s ready, the dough will be more than doubled in size.
  5. About 30 minutes before the dough is ready (the end of the 2 hours), heat the oven to 450°F. Put a Dutch oven on the middle rack of the oven as it heats.
  6. When the dough is ready, carefully remove the Dutch oven from the oven and pick up the dough by the parchment paper and place into the Dutch oven. Spray the top of the dough with water and put the lid back on. Then get it into the oven.
  7. Bake for 30 minutes with the lid on, then remove the lid and bake for another 20 minutes, until the loaf is beautifully browned. Remove the bread and let cool on a rack.


April 16, 2014

Cinnamon Raisin Swirl Bread

No comments:
Yum

The recipe is easily doubled, and it would probably be easier to mix that way. It could do with more cinnamon flavor, so maybe double that or incorporate into the dough somehow.

Make this for Easter breakfast. Enjoy!

Cinnamon Raisin Swirl Bread

Yield: 1 loaf
Ingredients
    Dough
  • 4 tablespoons unsalted butter
  • 10 1/3 oz bread flour
  • 1 3/8 oz nonfat dry milk powder
  • 1/6 cup sugar
  • 1/2 tablespoon yeast
  • 6 oz warm water (110 degrees)
  • 1/2 egg, beaten
  • 3/4 teaspoon salt
  • Filling
  • 3/4 cup raisins
  • 1.5 tablespoons cinnamon
  • 1/2 teaspoon vanilla extract
  • 1/4 teaspoon salt
  • Egg Wash
  • 1/2 egg, beaten
  • a pinch of salt
Cooking Directions
  1. Cut butter into 16 pieces and toss with 1/2 tablespoon flour; set aside to soften while mixing dough.
  2. Whisk remaining flour, milk powder, sugar, and yeast together in bowl of stand mixer. Using stand mixer fitted with dough hook, add water and 1/2 an egg and mix on medium-low speed until cohesive mass forms, about 2 minutes, scraping down sides of bowl as necessary. Cover mixing bowl with plastic wrap and let stand for 20 minutes.
  3. Adjust oven rack to middle position and place metal loaf or cake pan on bottom of oven.
  4. Remove plastic from mixer bowl, add salt, and mix on medium-low speed until dough is smooth and elastic and clears sides of bowl, 7 to 15 minutes. With mixer running, add butter, a few pieces at a time, and continue to knead until butter is fully incorporated and dough is smooth and elastic and clears side of bowl, 3 to 5 minutes longer. Add raisins and mix until incorporated, 30 to 60 seconds.
  5. Transfer dough to large greased bowl, and using a bowl scraper or rubber spatula, fold dough over itself by gently lifting and folding edge of dough toward middle. Turn bowl 90 degrees and fold again. Turn bowl and fold dough 6 more times (for a total of 8 folds). Cover tightly with plastic and transfer to middle rack of oven. Pour 3 cups of boiling water into loaf pan in oven, close oven door, and allow dough to rise for 45 minutes.
  6. Remove bowl from oven and gently press down on center of dough to deflate. Repeat folding step (making total of 8 folds), re-cover, and return to oven until doubled in volume, about 45 minutes.
  7. Whisk filling ingredients together until well combined. Set aside. Grease a loaf pan.
  8. Transfer dough to lightly floured surface. Pat into a 6 x 11 inch rectangle. With short side facing you, fold long sides in like a business letter to form a 3 x 11 inch rectangle. Roll dough away from you into a ball. Dust with flour and flatten with rolling pin into 7 x 18 inch rectangle with 1/4 inch thickness.
  9. Using a spray bottle, spray dough lightly with water. Sprinkle half of filling mixture evenly over dough, leaving 1/4 inch border on 18 inch sides and 3/4 inch border on 7 inch sides. Spray filling lightly with water. With short side facing you, roll dough away from you into a firm cylinder. Turn loaf seam side up and pinch closed, then pinch ends closed. Dust loaf lightly on all side with flour and let rest for 10 minutes.
  10. Cut loaf in half lengthwise and turn halves so cut sides are facing up. Gently stretch each half into 14 inch length. Line up pieces of dough and pinch 2 ends of strips together. Take the piece on the left and lay over the piece on the right. Repeat, keeping cut side up, until pieces of dough are tightly twisted. Pinch ends together.
  11. Transfer loaf, cut side up, to prepared loaf pan; pushing any exposed raising into the seams. Cover loosely with plastic, return to oven, and allow to rise for 45 minutes.
  12. Remove loaf and water pan from oven. Heat oven to 350 degrees. Allow to rise at room temperature until almost doubled in size, about 45 minutes longer. The top of the loaf should rise about 1 inch over lip of pan.
  13. Brush loaf with egg mixture. Bake until crust is well browned, about 25 minutes. Reduce oven temperature to 325 degrees, tent loaf with aluminum foil, and continue to bake about 20 minutes more (until internal temperature reaches 200 degrees).
  14. Transfer pan to wire rack and let cool for 5 minutes. Remove loaf from pan, return to rack, and cool to room temperature before slicing, about 2 hours.

February 19, 2014

Sandwich Bread from Sourdough Starter

No comments:
Yum
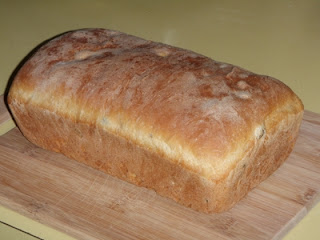
Sandwich bread can be made with a sourdough starter. The result is a bread with a softer texture, stronger crumb, and a slightly tangy taste. The sour taste can be changed depending on how long the dough ferments and the amount of sugar used. Either way, you'll get a beautiful loaf that is easy and healthier than almost anything you'll find in the stores.

Check below the recipe on how to make your sourdough leaven. Enjoy!


Sandwich Bread from Sourdough Starter

Yield: 2 loaves
Ingredients
  • 2 cups sourdough leaven
  • 256 g all-purpose flour
  • 400 g whole wheat flour
  • 398 g warm water
  • 4 tablespoons canola oil
  • 1 teaspoon salt
  • 80 g brown sugar, optional
Cooking Directions
  1. In a stand mixer with the mixing paddle, mix the sourdough leaven with the water, oil, salt, and brown sugar, if using.
  2. Mix in the flour with the same attachment.
  3. Let sit 12-36 hours. The longer the fermentation time, the stronger the sourdough flavor. I recommend 24 hours at first, then adjust from there next time.
  4. Over the 12-36 hours, fold and turn dough over itself 2 to 4 times.
  5. About an hour before baking, split into two lightly greased loaf pans. Allow to double in size. Score if you like.
  6. Bake at 350 F for 60 minutes.
  7. Let rest 5 minutes in the pans before removing to a wire rack. Allow to cool completely.

2 cups sourdough leaven:

4 tbs sourdough starter
202 g warm water
144 g all-purpose flour

Mix together (but leave some lumps). Let sit overnight to 24 hours. Put 4 tbs back with the other starter in the morning.

February 05, 2014

Fluffy Soft Dinner Rolls

No comments:
Yum
Deliciously soft and fluffy dinner rolls. Very easy, and what little effort there is is totally worth it. They're also small enough so that you don't need to feel guilty at all about them. Enjoy!

Fluffy Soft Dinner Rolls

Yield: 24-30 rolls
Ingredients
  • 1 package active dry yeast
  • 1 cup warm water
  • 1/2 cup sugar
  • 1 egg, beaten
  • 2 teaspoons salt
  • 1 cup milk, scalded but cooled to warm
  • 6 ounces butter, melted
  • 5 cups all-purpose flour
Cooking Directions
  1. In a standing mixing bowl with dough hook, dissolve yeast in warm water. Let sit until lightly foamy, then stir in sugar.
  2. Mix in egg, salt, warm milk, and 4 ounces of melted butter.
  3. Slowly add 5 cups flour, adding more as needed to make an elastic dough. Knead for 5 minutes.
  4. Place dough in buttered bowl, cover with towel, and set in a warm place to rise until double in bulk, about 1 hour.
  5. Lightly oil a muffin pan. Punch down dough and form dough into 1-inch balls. Place 3 balls in each muffin tin. Fill muffin pan, cover with towel, and allow to rise an additional 1/2 hour.
  6. Preheat oven to 425 degrees F.
  7. Brush with the remaining melted butter. Bake for 10 to 15 minutes, until golden brown.

January 22, 2014

Homemade Mushroom Stuffing

No comments:
Yum
If you ever wanted to make your own stuffing (or dressing) instead of buying that boxed stuff, this is as easy as it gets. Enjoy!


Homemade Mushroom Stuffing

Yield: 10 servings
Ingredients
  • 4 tablespoons butter
  • 1 onion, chopped
  • 3 celery stalks, sliced
  • 1/2 pound mushrooms, sliced
  • 1/2 teaspoon kosher salt
  • 1 teaspoon dried thyme
  • 10 cups dried breads cubes (1 inch)
  • 1 cup water or broth
  • 1 teaspoon dried parsley
Cooking Directions
  1. Melt butter in a large pan. Saute onions and celery on medium heat until onions are translucent.
  2. Add mushrooms, salt, and thyme for 5 minutes.
  3. Turn off heat. Add bread cubes and gently stir them into the mushroom mixture.
  4. Slowly pour water or broth over the bread cubes folding everything carefully so the bread cubes do not break apart too much.
  5. Preheat oven to 350 degrees F.
  6. Scoop stuffing into a medium casserole dish and bake uncovered for 40 minutes or until nice and toasty on top.

August 28, 2013

Spent Grain Sandwich Bread

No comments:
Yum

When you have leftover spent grains from that wonderful batch of home brew, here's exactly what you should do with it. Sure, you could throw it out, feed it to your pets, add it to your fertilizer, or make porridge with it. But that's not as much fun. So take a little time and make the tastiest spent grain bread ever. Enjoy!


Spent Grain Sandwich Bread

Yield: 1 loaf
Ingredients
  • 1 cup spent grain, drained
  • 300 g warm water
  • 200 g white flour
  • 200 g whole wheat flour
  • 25 g canola oil
  • 1 tsp salt
  • 2 tsp yeast
Cooking Directions
  1. In a stand mixer or large bowl, mix the water, spent grain, canola oil, and yeast.
  2. Let sit for 5 minutes.
  3. Add the salt and mix.
  4. Add the flour and mix until uniform. (The dough will be too wet to knead by hand.)
  5. Cover with a kitchen towel, plastic wrap, or foil for 2 hours. The dough will rise considerably and then flatten on top.
  6. Oil a loaf pan. Using either wet hands or by flouring the surface of the dough and your hands, fold the dough under itself inwards two to four times and place in the pan.
  7. Let rise until doubled, about 30-45 minutes.
  8. Bake at 350 F for 1 hour.
  9. Remove from oven and let sit in the pan for 5 minutes before removing from pan and let it cool on a rack. Do not cut into it until it has cooled completely.

July 15, 2013

Folded Steamed Bao Recipe

No comments:
Yum

Now you too can be a fancy schmancy gourmet chef at home with these homemade folded steamed buns (or baos). Made with more or less the same dough as traditional baos, the folded style allows for cramming in a lot more pulled pork or, as is popular right now, crispy pork belly. Enjoy!

Folded Steamed Bao Recipe

Yield: 16 medium buns
Ingredients
  • 3 cups (12.5 oz) all-purpose flour
  • 3/4 cup water
  • 2 tablespoons canola oil
  • 2 tablespoons sugar
  • 2 teaspoons baking powder
  • 1 1/2 teaspoons yeast
Cooking Directions
  1. Put the yeast in a small bowl, add the lukewarm water and set aside for 1 minute to soften. Whisk in the oil to blend and dissolve the yeast. Set aside.
  2. Combine the sugar, baking powder, and flour in a large bowl. Make a well in the center and pour in the yeast mixture. Slowly stir with a wooden spoon, moving from the center toward the rim, to work in all the flour. Add lukewarm water by the teaspoon if this doesn't happen with relative ease.
  3. Keep stirring as a ragged, soft mass forms. Then use your fingers to gather and pat the dough together into a ball.
  4. Transfer to a work surface and knead for about 5 minutes, until smooth, fingertip-soft and slightly elastic.
  5. Lightly oil a clean bowl and add the dough. Cover with plastic wrap and put in a warm, draft-free place to rise until nearly doubled, 30 to 45 minutes. The dough is now ready to use.
  6. Roll into two logs, and cut into 16 pieces.
  7. Flatten each piece with a rolling pin into a slightly oval shape.
  8. Lightly oil one side and fold in on itself. Place on a cut piece of parchment or wax paper.
  9. Steam the buns for 10 minutes.

June 14, 2013

Thin Crust Pizza on Steel

No comments:
Yum

Maybe you've tried the other great pizza crust recipe we've featured here before. Okay, well while that is good, this new recipe is great!

And it's easier! I recently received a Baking Steel, which is like a pizza stone but better because it gets hotter and holds its temperature better. That means a quicker cooking time and a charred crust underneath - perfect for those Neapolitan-style pizzas you've always wanted to make at home. They are done in a little under 5 minutes!


If you don't have a piece of steel, this new dough recipe will work great on a pizza stone or upside down cookie sheet. It'll just need to bake a little longer.


Give it a whirl, and remember not to overload the pizza with too many toppings. Some of our favorites are sauteed mushrooms with spinach and feta, with a little mozzarella baked on the pizza, and one with mozzarella, sauce, caramelized onions, roasted red peppers, and ricotta. Enjoy!


Thin Crust Pizza on Steel

Yield: 3 pizzas
Ingredients
  • 1 1/3 cups (310 g) lukewarm water
  • 3/4 tablespoon yeast
  • 3/4 tablespoon kosher salt
  • 1/8 cup olive oil
  • 3 1/4 cups (423 g) all-purpose flour
Cooking Directions
  1. Mix the yeast, salt, and olive oil with the water in a non-airtight lidded container.
  2. Mix in the flour without kneading, using a spoon.
  3. Cover and allow to rest at room temperature until dough rises and flattens, about 2 hours.
  4. At this point, you can store it in the fridge for up to a week or dust the top with flour and cut into three pieces. The other pieces may be wrapped tightly with plastic wrap and stored in the freezer for several months.
  5. Preheat oven to its highest temperature and place baking steel or stone on the lowest rack. Let preheat for 20-40 minutes.
  6. Shape dough into a ball by stretching the surface around to the bottom on all four sides. Do this minimally.
  7. Flatten with your hands on a well-floured surface. Get the dough to 1/8 inch thick. Use a floured rolling pin if needed. The dough will spring back some, so you may need to stretch it further than you think of stretch it again. Once stretched and relaxed, place onto a cornmeal-covered pizza peel.
  8. Place your toppings on the dough. Be minimalistic.
  9. Slide the pizza directly onto the steel or stone. Pizza may be done in as little as 4 minutes, so check to make sure it's not overcooking.
  10. Allow to cool for a minute on a rack to allow the cheese to set.

May 31, 2013

Blueberry Muffins

No comments:
Yum

A couple years back, we spent a wonderful weekend at a B&B in New Hampshire. It was amazing, and one of the best B&Bs we've ever been to. One of the huge pluses was the breakfast, which was made completely from scratch every morning for us and that was different every day. Apparently, over the years others like us have requested the recipes because they were so good!

These blueberry muffins are bursting with flavor and were one of the many highlights of the trip. And when they're warm and fresh out of the oven, oh man, there's almost nothing better. Enjoy!


Blueberry Muffins

Yield: 16 muffins
Ingredients
  • 2 cups all-purpose flour
  • 1/3 cup sugar
  • 2 1/2 teaspoons baking powder
  • 1/2 teaspoon baking soda
  • 1 cup blueberries
  • 1 cup buttermilk
  • 1/3 cup canola oil
  • 1 egg
  • sugar
Cooking Directions
  1. Preheat 400F.
  2. In a large bowl, mix the dry ingredients. Add the blueberries and toss.
  3. In another bowl, mix the wet ingredients.
  4. Pour wet ingredients into dry ingredients and mix quickly with a fork, until flour disappears. Do not overmix. Batter should be lumpy.
  5. Spoon batter into greased muffin tins about 3/4 full.
  6. Sprinkle each muffin with a little sugar, up to 1/2 teaspoon.
  7. Bake 25 minutes or until golden brown.
  8. Serve warm.

February 07, 2013

Homemade Thin Crust Pizza Dough

1 comment:
Yum

Best homemade thin pizza crust yet. Light and crispy on the outside. Soft and airy on the inside. The trick is...well, follow the instructions and you'll see. Really, it's absolutely delicious. And there are a few easy tricks to it. Enjoy!


Homemade Thin Crust Pizza Dough

Yield: 1 large pizza
Ingredients
  • 3 1/2 cups (448g) all-purpose flour
  • 1 cup warm water
  • 2 teaspoons yeast
  • 1/4 cup olive oil
  • 1 teaspoon salt
  • optional: 1 tablespoon sugar or honey
Cooking Directions
  1. Mix yeast with water and sugar or honey, if using. Let sit for a few minutes.
  2. Mix in oil and salt.
  3. Mix in flour until just mixed together. Do not knead.
  4. Right before kneading, let rest for 15 minutes to allow the gluten to form and moisture to spread throughout.
  5. Knead until smooth and elastic. Cut into two. Store one in the fridge or freezer for another time.
  6. Let rise until doubled (about an hour).
  7. Preheat oven to highest temperature and place a pizza stone or upside down baking sheet on the highest rack.
  8. Stretch dough into pizza shape by hand.
  9. Let dough relax for 5 minutes before placing in the oven.
  10. Add toppings and immediately put in the oven.
  11. Bake until browned and crispy (about 8-12 minutes).

October 24, 2012

Peruvian Spicy Creamed Chicken - Aji de Gallina

1 comment:
Yum

If you, like us, have a friend bequeath you packets of aji pepper puree, you may be dumbfounded at first too. Well look no further because you've found the answer to your aji prayers!

By far the best Peruvian dish we have ever made. OK so it's also the only Peruvian dish we've ever made. Yet after devouring this Aji de Gallina I'm not sure I could force myself to make any other Peruvian cuisine - it's that good.

This is a beautifully simple, though perhaps time-consuming dish to make. But the great thing is that it makes a ton of food. Great for dinner parties.


Peruvian Spicy Creamed Chicken - Aji de Gallina

Yield: Serves 6-8
Ingredients
  • 1 1/2 lb. chicken breast
  • 4 cups chicken stock
  • 1/2 cup canola oil
  • 1 packet aji pepper puree
  • 2 cloves garlic, chopped
  • 1 large onion, chopped
  • 3 tablespoons walnuts, chopped
  • 3 tablespoons Parmesan cheese
  • 4 slices bread
  • 3/4 cup evaporated milk
  • 4 yellow potatoes
  • 2 hard boiled eggs
  • 10 black olives, halved
  • 1/4 - 1/2 cup cooked rice
Cooking Directions
  1. Cook the yellow potatoes in salted water until tender when pierced with a fork. Let cool, peel, cut into quarters, and set aside.
  2. Place the bread in a small bowl and pour the evaporated milk over it to soak. Set aside.
  3. Place the chicken breasts in a pot with the chicken stock, and bring to a simmer. Cook for 10-15 minutes, until chicken is just barely cooked through. Set chicken aside to cool. Strain broth and reserve 2 cups.
  4. In a blender, process pepper puree with the oil until smooth. Saute the garlic and onions with the pureed peppers and oil, until the onions are soft and golden. Remove from heat and let cool.
  5. Shred the cooled chicken into bite-size pieces.
  6. In a blender or food processor, process the evaporated milk and bread mixture with the walnuts and Parmesan cheese until smooth. Add the cooked onion mixture and process briefly.
  7. Return onion mixture to pan, and add 1 1/2 cups of the reserved chicken stock. Bring to a low simmer, and stir in the chicken. Heat until warmed through, adding more chicken stock if sauce is too thick.
  8. Serve over rice, garnished with the yellow potatoes, slices of hard boiled egg, and black olives.

May 31, 2012

Croatian Easter Breakfast

1 comment:
Yum

Happy Easter, all!

Remember when the Easter Bunny came around and hid eggs for you to find in your yard? And sometimes in your grandparent's yard? And sometimes the park? Man, that bunny can get around! Well that was practically the only tradition I had for Easter every year. I don't recall large family gatherings and lavish meals.

My better half, on the other hand, has grown up with Easter being a huge family get-together. Neither of us are around family this year, so in honor of one of the traditions that her family celebrates, we prepared a traditional Croatian Easter Breakfast...even though she's not Croatian (but her uncle-in-law is).

Honestly, I don't think a tradition could be any easier. 4 things make up breakfast. That's it. They all go hand-in-hand, yes they do. It's quick to prepare as well (unless you make one from scratch). Learn all about Croatian Easter Breakfast. Happy hopping!

Ingredients

Per Person:
1 hard-boiled egg
1 slice of ham
1 green onion
1 slice of raisin bread

Directions

1. Hard-boil an egg. Easy. Done.
2. Heat up a piece of ham (or not - either way works). Easy. Done.
3. Wash a green onion. Easy. Done.
4. Slice one piece of your favorite raisin bread. Easy. Done.
You've gotta love how absurdly simple that was. I did! Yet it tastes great. Most importantly, it brings a little tradition into the home for us to enjoy.

May 22, 2012

Cinnamon Raisin Swirl Bread

No comments:
Yum

A lovely Cinnamon Raisin Swirl Bread is the perfect way to lighten up your day.

With soft swirls of cinnamon, a light and springy interior, and raisins throughout, what more could you ask for?

The absolute true beauty of this is that it's not sugared down. You can taste the subtleties of the different ingredients, which compliments a nice spot of tea. Use in your own Croatian Easter Breakfast or any which way. Enjoy!
Yields 1 loaf

Ingredients

1/2 cups milk
1/3 cup warm water
1 package active dry yeast
1 egg
1/6 cup white sugar
1/3 teaspoon salt
1/6 cup butter, softened
1/2 cup raisins
2 2/3 cups all-purpose flour
1/4 cup white sugar
2 tablespoons ground cinnamon

Directions

1. Let milk warm to room temp.

2. Dissolve yeast in warm water, and set aside until yeast is frothy. Mix in eggs, sugar, butter or margarine, salt, and raisins. Stir in milk. Add the flour gradually to make a stiff dough.

3. Knead dough on a lightly floured surface for a few minutes. Place in a large, greased mixing bowl, and turn to grease the surface of the dough. Cover with a damp cloth. Allow to rise until doubled.

4. Roll out on a lightly floured surface into a large rectangle 1/2 inch thick. Moisten dough with 2 tablespoons water. Mix together 1/4 cup sugar and 2 tablespoons cinnamon, and sprinkle mixture on top of the moistened dough. roll up tightly; the Roll should be about 3 inches in diameter. Tuck under ends and place loaf into well greased 9 x 5 inch loaf pan. Lightly grease tops of loaf. Let rise again for 1 hour.

5. Bake at 350 degrees F (175 degrees C) for 35 minutes, or until loaf is lightly browned and sounds hollow. Remove loaf from pan. Let cool before slicing.

April 26, 2012

Blackened Catfish Po'Boy

No comments:
Yum

Blackened Catfish Po'Boys are simply amazing. I mean first of all, catfish is amazing. Second of all, po'boys are amazing. And third of all, it's all amazing together!

Simple, easy, carefree. I'm in! A bit of arugula on top and voila. Yum.


Ingredients

2 teaspoons cayenne pepper
2 teaspoons lemon pepper
2 teaspoons garlic powder
2 teaspoons salt
2 teaspoons pepper
1 pound catfish fillets
2 tablespoons butter
1 cup arugula
1 baguette, sliced into 6 inch sections

Directions

Preheat oven to 350 degrees F (175 degrees C). Lightly grease a medium baking dish.

In a shallow, medium bowl, mix cayenne pepper, lemon pepper, garlic powder, salt and pepper.

Brush both sides of catfish fillets with butter. Rub fillets with the cayenne pepper mixture on both sides.

Heat a large heavy skillet over medium-high heat until really hot. Add fillets, and fry approximately 2 minutes on each side, until slightly blackened.

Arrange blackened fillets in a single layer in the prepared baking dish. Bake 30 to 35 minutes in the preheated oven, until fish is easily flaked with a fork.

April 07, 2012

Croatian Easter Breakfast

No comments:
Yum

Happy Easter, all!

Remember when the Easter Bunny came around and hid eggs for you to find in your yard? And sometimes in your grandparent's yard? And sometimes the park? Man, that bunny can get around! Well that was practically the only tradition I had for Easter every year. I don't recall large family gatherings and lavish meals.


My better half, on the other hand, has grown up with Easter being a huge family get-together. Neither of us are around family this year, so in honor of one of the traditions that her family celebrates, we prepared a traditional Croatian Easter Breakfast...even though she's not Croatian (but her uncle-in-law is).

Honestly, I don't think a tradition could be any easier. 4 things make up breakfast. That's it. They all go hand-in-hand, yes they do. It's quick to prepare as well (unless you make one from scratch). Learn all about Croatian Easter Breakfast. Happy hopping!

April 06, 2012

Cinnamon Raisin Swirl Bread

No comments:
Yum

A lovely Cinnamon Raisin Swirl Bread is the perfect way to lighten up your day.


With soft swirls of cinnamon, a light and springy interior, and raisins throughout, what more could you ask for?


The absolute true beauty of this is that it's not sugared down. You can taste the subtleties of the different ingredients, which compliments a nice spot of tea. Use in your own Croatian Easter Breakfast or any which way. Enjoy!

March 17, 2012

(B)Elated Irish Soda Bread (3 Variations)

No comments:
Yum


Belated Elated Irish Soda Bread. Long overdue but finally making its way to your very eyes is the much-anticipated, often-imitated-but-never-duplicated Irish soda bread.

There are three variations we have here:
- The first is Irish-Irish soda bread - like they invented in Ireland.
- The second is American-Irish soda bread - like the kind found in America with the raisins.
- The third is a mix between the two - no raisins but with a bit of egg enough to change the flavor.


Maybe (at this late juncture) you're craving a wee bit o' Irish, going through the withdrawls of St. Patty's Day. If you're like me, you most certainly are (except this feeling lasts all year), and hopefully, these wee treats will brighten your day. Enjoy!

March 06, 2012

Savory Butternut Squash and Kale Bread Pudding

No comments:
Yum
Ingredients

2 lbs peeled seeded butternut squash, cut into 1-inch cubes (about 6 cups)
7 large eggs
2 1/4 cups half & half
6 tbsp dry white wine
1 1/2 tsp dijon mustard
1 sourdough baguette
1 cup chopped shallots (about 4 large)
2 bunches kale, ribs removed, coarsely chopped
8 oz. extra-sharp cheddar cheese, grated
olive oil
kosher salt and pepper

Directions

Cut baguette into 1-inch cubes and (if not dry) toast in 200 degree oven for about 10 minutes, until bread is dry, like day-old bread. Turn oven up to 400 degrees. Toss squash with 1 tbsp olive oil on rimmed baking sheet, sprinkle with salt and pepper, and bake until squash is tender, about 20-25 minutes. Turn with spatula occasionally.

Whisk eggs in large bowl, add half & half, wine, mustard, and 1 1/2 tsp kosher salt and whisk to blend. Set aside.

Heat about 2 tbsp oil in large pot over medium-high heat. Add shallots and saute until soft, about 5 minutes. Add kale. Cover and cook 2 minutes. Uncover and stir until kale is wilted but still bright green, about 5 minutes. (I cook mine longer, though, because I like the kale less crunchy.)

Reduce oven temperature to 350. Generously butter 13x9x2-inch baking dish. Spread half of bread cubes in the bottom, topped with half of kale mixture, then half of squash, and sprinkled with half of cheese. Repeat with remaining bread, kale, squash, and cheese. Pour egg mixture over the bread pudding. Cover with foil and bake for 20 minutes. Remove foil and bake uncovered until custard is set and bread feels springy to the touch, about 20 minutes longer. Broil 2 minutes right before serving until cheese browns slightly.

Notes:
*I don't like soggy bread pudding, so I altered the original recipe a little. Here are the things I did, so you can decide how you like it best.
* The recipe didn't call to toast the bread, just to cut it up, but I like it more stale.
*The recipe said to soak the bread in the egg mixture for 30 minutes before baking, but I completely skipped this step because I didn't want all soggy bread.
* When I did finally pour the egg mixture in the pan right before baking, I made sure not to completely cover the top pieces of bread, making sure they were still dry on top.
* I used more cheese

From the kitchen of Liza Wilson