Showing posts with label milk. Show all posts

April 03, 2015

Sinful Baked Mac and Cheese

No comments:
Yum
Deliciously sinful baked mac and cheese is a luxury. A luxury in that it's so rich, you should probably only have a small portion and have a large salad and steamed veggies with it. It's not, however, a luxury in time or cost. Extremely easy and simple, this will fulfill any mac and cheese craving you're likely to have for a long time. Enjoy!


Sinful Baked Mac and Cheese

Yield: 8-12 servings
Ingredients
  • 4 tablespoons unsalted butter
  • 2 3/4 cups milk
  • 1/4 cup flour
  • 1/8 teaspoon nutmeg
  • 1/4 teaspoon black pepper
  • 1/4 teaspoon cayenne pepper
  • 2 cups (8 ounces) sharp white cheddar cheese, grated
  • 1 cup (4 ounces) Gruyere, grated OR
  • 1/2 cup parmesan, grated
  • 1/2 pound macaroni or similar
Cooking Directions
  1. Preheat oven to 375 F. Butter a 3-quart casserole dish; set aside.
  2. Warm the milk in a medium saucepan over medium heat.
  3. Melt the remaining butter in a large skillet over medium heat. When it bubbles, add the flour. Cook, stirring, for 1 minute.
  4. While whisking, slowly pour in the hot milk a little at a time to keep the mixture smooth. Continue whisking constantly until the mixture bubbles and becomes thick, 8 to 12 minutes.
  5. Remove the pan from the heat. Stir in nutmeg, black pepper, cayenne pepper, 1 1/2 cups cheddar cheese, and 3/4 cups Gruyère (or 1/4 cup parmesan). Set the cheese sauce aside.
  6. Bring a large pot of salted water to a boil. Cook the macaroni until the outside of is cooked and the inside is underdone, 2 to 3 minutes. Rinse under cold water and drain the macaroni. Stir the macaroni into the cheese sauce.
  7. Pour the mixture into the baking dish. Sprinkle the remaining cheeses over the top. Bake until golden brown, about 30 minutes. Transfer the dish to a wire rack for 5 minutes to set, then serve.

March 06, 2015

Roast asparagus salad with baked goat cheese

No comments:
Yum
This is a wonderful, fresh, and flavorful salad. Rich but not too rich. The asparagus gets tender, the dressing is outstanding, and the goat cheese is crispy yet smooth. Serve it as a starter or just as a light meal. Enjoy!


Roast asparagus salad with baked goat cheese

Yield: 4 servings
Ingredients
  • 1/4 cup olive oil
  • 1/4 cup shallot, minced
  • 2 tablespoons balsamic vinegar
  • 1 teaspoon Dijon mustard
  • 4 cups frisee
  • salt and pepper
  • 2 pounds asparagus
  • olive oil
  • kosher salt
  • black pepper
  • 1 cup flour
  • 1 egg, beaten
  • 1 cup milk
  • 2 cups panko breadcrumbs
  • 4 slices goat cheese (3/4 inch slices)
Cooking Directions
  1. Place the shallot and olive oil in a skillet and cook for 2 minutes over medium heat.
  2. Add the vinegar, mustard, salt, pepper, and stir well to incorporate. Set aside and cool to room temperature.
  3. Preheat the oven to 375 F.
  4. Break off the tough ends of the asparagus, and, if they're thick, peel them.
  5. Place the asparagus on a baking sheet, drizzle with olive oil, then toss to coat the asparagus completely. Spread the asparagus in a single layer and sprinkle liberally with salt and pepper.
  6. Roast the asparagus until tender but still crisp.
  7. Meanwhile, put the flour in one bowl, mix the egg and milk in one bowl, and put he breadcrumbs in one bowl.
  8. Dip the cheese slices into the flour, then the egg-milk wash, and then into the breadcrumbs, alternating your hands.
  9. Refrigerate until ready to use.
  10. When ready to use, turn the oven broiler to low. Place the goat cheese discs onto an oiled pan and place under the broiler on high. Broil until brown.
  11. Toss the frisee in the dressing until well-coated, then season with salt and pepper.
  12. Plate, and top each salad with a goat cheese disk and asparagus spears. Finish with extra salt and pepper.

January 30, 2015

Ribbon Finger Jello

No comments:
Yum
Let's take a step back in time to when jello desserts were the bee's knees. Around that time is when you get some really weird ones that involved ham or candied things. Gross. But some of them were actually pretty decent, like this here recipe. It's a beautiful presentation of layers jello and gelatinized condensed milk. Luckily, it also tastes as good as it looks. Enjoy!


Ribbon Finger Jello

Yield: 1 big pan of jello
Ingredients
  • 3 oz package orange gelatin
  • 3 oz package lime gelatin
  • 3 oz package lemon gelatin
  • 3 oz package strawberry gelatin
  • 6 envelopes unflavored gelatin
  • 14 oz can condensed milk
  • 5 3/4 cup boiling water
  • 1/4 cup cold water
Cooking Directions
  1. Dissolve the orange gelatin and 1 envelope of unflavored gelatin in 1 cup of hot water. Pour into a 3 x 9 x 13 inch pan which has been lightly sprayed with oil. Chill until almost firm, approximately 20 minutes. If too firm, the next layer will slide off.
  2. Soften 2 envelopes of unflavored gelatin in 1/4 cup cold water. Add 3/4 cup hot water. In a separate bowl, mix the condensed milk with 1 cup boiling water. Combine both mixtures. Pour 1 cup of the new milk mixture over the first layer and add 1 cup between each subsequent layer.
  3. Repeat each gelatin procedure in this order: orange, lime, lemon, strawberry. Alternate with milk mixture and ending with a gelatin layer. While each layer is chilling, mix the next layer. If mixture becomes too thick, set in hot water or microwave. When completely firm, cut into desired size.
  4. For a quick method, place the pan with gelatin in the freezer for approximately 12 minutes, then approximately 8 minutes for each subsequent layer.

January 09, 2015

Labneh Balls

No comments:
Yum
Labneh is a pretty good substitute for cheese, especially if you like yogurt. This labneh is made from kefir, so it's kefir cheese. It's even more impressive when you form little balls of super intense spices of it. Enjoy!


Kefir Labneh Balls

Yield: 10+ balls
Ingredients
  • 1 quart kefir
  • salt
  • paprika
  • cayenne pepper
  • ginger powder
  • onion powder
  • garlic powder
  • bread crumbs
Cooking Directions
  1. Prepare kefir like you normally would but let it ferment longer until it completely separates from the whey.
  2. Gently place the yogurt in the center of cheesecloth folded a couple times. Gather up the ends of the cloth and tie up tight, gently gathering up the kefir curds to form a ball. Save the whey for your own uses.
  3. Hang the kefir overnight. The next morning, much of the whey will have drained out - firm on the outside and soft and creamy on the inside.
  4. Put your spice mix in a bowl and bread crumbs in another bowl. The amount you need will vary according to preferences, so season the spices to taste. Pinch off chunks of cheese, dunk them in the spices, then gently roll them to form balls.
  5. They can be served immediately or left in the fridge for a couple days. The bread crumb ones are also pretty good baked.

September 10, 2014

Bismarck or Dutch Baby

No comments:
Yum
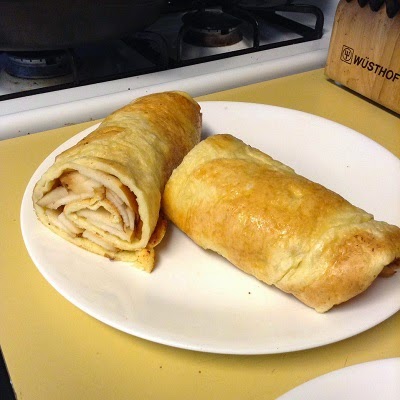
Sometimes called a Bismarck, sometimes a Dutch Baby, sometimes a German Pancake, and sometimes probably a whole mess of things. What it is is a baked pancake that houses some delicious fruit (if desired), and a warm, soft interior, yet crispy exterior.

Easier and quicker to make than regular pancakes and possibly even healthier because it's sugar free. This naturally no added sugar pancake will please everyone. Other variations include cooked fruit or preserves or plain with a dusting of powdered sugar and or cinnamon. Enjoy!


Bismarck or Dutch Baby

Yield: 4 servings
Ingredients
  • 1/2 stick butter
  • 1/2 cup flour
  • 1/2 cup milk
  • 2 eggs
  • 1 pear, sliced thin
  • lemon juice
Cooking Directions
  1. Heat oven to 475 F.
  2. Place butter in cast iron or oven-safe dish. Put in oven once it has reached 475 F. Melt the butter until it sizzles and then take it out.
  3. Meanwhile, mix together the flour, milk, and eggs into a batter. Do not overmix.
  4. Make sure the butter has coated the entire pan, and pour the batter into the center.
  5. Bake in the oven for 12 minutes, until it has puffed up and started to brown.
  6. Take the pan out and place the Bismarck / Dutch Baby on a plate.
  7. Sprinkle lemon juice over it and place pear slices everywhere.
  8. Roll it up and serve immediately.

April 16, 2014

Cinnamon Raisin Swirl Bread

No comments:
Yum

The recipe is easily doubled, and it would probably be easier to mix that way. It could do with more cinnamon flavor, so maybe double that or incorporate into the dough somehow.

Make this for Easter breakfast. Enjoy!

Cinnamon Raisin Swirl Bread

Yield: 1 loaf
Ingredients
    Dough
  • 4 tablespoons unsalted butter
  • 10 1/3 oz bread flour
  • 1 3/8 oz nonfat dry milk powder
  • 1/6 cup sugar
  • 1/2 tablespoon yeast
  • 6 oz warm water (110 degrees)
  • 1/2 egg, beaten
  • 3/4 teaspoon salt
  • Filling
  • 3/4 cup raisins
  • 1.5 tablespoons cinnamon
  • 1/2 teaspoon vanilla extract
  • 1/4 teaspoon salt
  • Egg Wash
  • 1/2 egg, beaten
  • a pinch of salt
Cooking Directions
  1. Cut butter into 16 pieces and toss with 1/2 tablespoon flour; set aside to soften while mixing dough.
  2. Whisk remaining flour, milk powder, sugar, and yeast together in bowl of stand mixer. Using stand mixer fitted with dough hook, add water and 1/2 an egg and mix on medium-low speed until cohesive mass forms, about 2 minutes, scraping down sides of bowl as necessary. Cover mixing bowl with plastic wrap and let stand for 20 minutes.
  3. Adjust oven rack to middle position and place metal loaf or cake pan on bottom of oven.
  4. Remove plastic from mixer bowl, add salt, and mix on medium-low speed until dough is smooth and elastic and clears sides of bowl, 7 to 15 minutes. With mixer running, add butter, a few pieces at a time, and continue to knead until butter is fully incorporated and dough is smooth and elastic and clears side of bowl, 3 to 5 minutes longer. Add raisins and mix until incorporated, 30 to 60 seconds.
  5. Transfer dough to large greased bowl, and using a bowl scraper or rubber spatula, fold dough over itself by gently lifting and folding edge of dough toward middle. Turn bowl 90 degrees and fold again. Turn bowl and fold dough 6 more times (for a total of 8 folds). Cover tightly with plastic and transfer to middle rack of oven. Pour 3 cups of boiling water into loaf pan in oven, close oven door, and allow dough to rise for 45 minutes.
  6. Remove bowl from oven and gently press down on center of dough to deflate. Repeat folding step (making total of 8 folds), re-cover, and return to oven until doubled in volume, about 45 minutes.
  7. Whisk filling ingredients together until well combined. Set aside. Grease a loaf pan.
  8. Transfer dough to lightly floured surface. Pat into a 6 x 11 inch rectangle. With short side facing you, fold long sides in like a business letter to form a 3 x 11 inch rectangle. Roll dough away from you into a ball. Dust with flour and flatten with rolling pin into 7 x 18 inch rectangle with 1/4 inch thickness.
  9. Using a spray bottle, spray dough lightly with water. Sprinkle half of filling mixture evenly over dough, leaving 1/4 inch border on 18 inch sides and 3/4 inch border on 7 inch sides. Spray filling lightly with water. With short side facing you, roll dough away from you into a firm cylinder. Turn loaf seam side up and pinch closed, then pinch ends closed. Dust loaf lightly on all side with flour and let rest for 10 minutes.
  10. Cut loaf in half lengthwise and turn halves so cut sides are facing up. Gently stretch each half into 14 inch length. Line up pieces of dough and pinch 2 ends of strips together. Take the piece on the left and lay over the piece on the right. Repeat, keeping cut side up, until pieces of dough are tightly twisted. Pinch ends together.
  11. Transfer loaf, cut side up, to prepared loaf pan; pushing any exposed raising into the seams. Cover loosely with plastic, return to oven, and allow to rise for 45 minutes.
  12. Remove loaf and water pan from oven. Heat oven to 350 degrees. Allow to rise at room temperature until almost doubled in size, about 45 minutes longer. The top of the loaf should rise about 1 inch over lip of pan.
  13. Brush loaf with egg mixture. Bake until crust is well browned, about 25 minutes. Reduce oven temperature to 325 degrees, tent loaf with aluminum foil, and continue to bake about 20 minutes more (until internal temperature reaches 200 degrees).
  14. Transfer pan to wire rack and let cool for 5 minutes. Remove loaf from pan, return to rack, and cool to room temperature before slicing, about 2 hours.

March 05, 2014

Sourdough Waffles

No comments:
Yum
The lightest, crispiest waffles you may ever make at home. Slightly tangy from the sourdough and perfect for a lazy weekend morning. Enjoy!


Sourdough Waffles

Yield: 6 Belgian waffles
Ingredients
  • 1 cup sourdough starter
  • 450g warm water
  • 325g all-purpose flour
  • 1 egg
  • 2 tablespoons canola oil
  • optional: 1/4 cup milk
  • 1/2 teaspoon salt
  • 1 teaspoon baking soda
  • optional: 2 tablespoons sugar
Cooking Directions
  1. The night before you want waffles, mix the sourdough starter with the warm water. Then mix in the flour. Some lumps are fine and will even out overnight. Let sit covered in a warm place for about 12 hours.
  2. In the morning, remove one cup of the batter and set aside. This is your starter now. Save it for next time.
  3. Mix in an egg, oil, and milk, if using, into the batter.
  4. In a separate small bowl, combine the salt, baking soda, and sugar, if using.
  5. Heat your waffle iron to the second-highest setting highest setting.
  6. Once preheated, sprinkle the salt/soda mixture over the batter. Fold (don't mix) to incorporate.
  7. Cook according to waffle iron manufacturer's instructions.

February 05, 2014

Fluffy Soft Dinner Rolls

No comments:
Yum
Deliciously soft and fluffy dinner rolls. Very easy, and what little effort there is is totally worth it. They're also small enough so that you don't need to feel guilty at all about them. Enjoy!

Fluffy Soft Dinner Rolls

Yield: 24-30 rolls
Ingredients
  • 1 package active dry yeast
  • 1 cup warm water
  • 1/2 cup sugar
  • 1 egg, beaten
  • 2 teaspoons salt
  • 1 cup milk, scalded but cooled to warm
  • 6 ounces butter, melted
  • 5 cups all-purpose flour
Cooking Directions
  1. In a standing mixing bowl with dough hook, dissolve yeast in warm water. Let sit until lightly foamy, then stir in sugar.
  2. Mix in egg, salt, warm milk, and 4 ounces of melted butter.
  3. Slowly add 5 cups flour, adding more as needed to make an elastic dough. Knead for 5 minutes.
  4. Place dough in buttered bowl, cover with towel, and set in a warm place to rise until double in bulk, about 1 hour.
  5. Lightly oil a muffin pan. Punch down dough and form dough into 1-inch balls. Place 3 balls in each muffin tin. Fill muffin pan, cover with towel, and allow to rise an additional 1/2 hour.
  6. Preheat oven to 425 degrees F.
  7. Brush with the remaining melted butter. Bake for 10 to 15 minutes, until golden brown.

December 27, 2013

Turkey Croquettes

No comments:
Yum
What do you do with those turkey leftovers? Make croquettes, of course!

Simple and nice and crispy, you'll enjoy the texture and much as the taste. They reheat well in a toaster oven as well. Enjoy!


Turkey Croquettes

Yield: 20-22 croquettes
Ingredients
  • 1 tablespoon unsalted butter
  • 1 medium onion, minced
  • course salt and freshly ground pepper
  • 1 teaspoon dried thyme
  • 2 cups finely chopped cooked turkey
  • 1/8 cup milk
  • 1 cup mashed potatoes
  • 1/4 cup all-purpose flour
  • 1 egg, beaten
  • 1 1/2 cups bread crumbs
  • canola oil
Cooking Directions
  1. Melt butter in a large skillet over medium-high heat. Add onion, 1/2 teaspoon salt, and 1/2 teaspoon pepper. Cook for 3 minutes. Stir in thyme, and cook for 1 minute. Stir in turkey, then milk, and cook until liquid evaporates, about 30 seconds. Transfer to a large bowl, and let cool for 10-15 minutes.
  2. Add potatoes, flour, and egg to turkey, and season with 1/4 teaspoon salt and 1/4 teaspoon pepper.
  3. Form 2 tablespoons turkey mixture into balls and drop into a shallow bowl of breadcrumbs, turn to coat, and pat into 2-inch disks. Arrange in a single layer on a baking sheet, and refrigerate for 10 minutes.
  4. Heat a very shallow layer (sheen) of oil in a skillet over medium heat. Working in batches, cook croquettes in a single layer until golden brown, about 2 minutes per side. Transfer to paper towels to drain. Pat tops with more paper towels.
Modified from Martha Stewart.

April 24, 2013

Vegetarian Moussaka with Sweet Potatoes

No comments:
Yum

A vegetarian version of our original Moussaka. Instead of meat, we chose portobello for its meaty qualities. Plus, how can you not love portobello and eggplant together in one dish? This one also includes a layer of sweet potatoes on the bottom that really goes nicely with the cinnamon and nutmeg spices used throughout the dish.


Moussaka

Yield: 8-12 servings
Ingredients
  • 3 eggplants, peeled and cut into half-inch slices
  • 1 sweet potato, cut into 1/4 inch slices
  • salt
  • 1/4 cup olive oil
  • 1 tablespoon butter
  • 1 pound portobello mushrooms, cut into 1/2 inch pieces
  • salt, to taste
  • black pepper, to taste
  • 2 onions, chopped
  • 1 clove garlic, minced
  • 1/4 teaspoon cinnamon
  • 1/4 teaspoon nutmeg
  • 1/2 teaspoon Italian herbs
  • 2 tablespoons dried parsley
  • 1 8-ounce can tomato sauce
  • 1/2 cup red wine
  • 1 egg, beaten
  • 4 cups milk
  • 1/2 cup butter
  • 6 tablespoons flour
  • salt, to taste
  • white pepper, to taste
  • 1.5-3 cups parmesan, grated
  • 1/4 teaspoon nutmeg
Cooking Directions
  1. Lay the slices of eggplant on paper towels, sprinkle lightly with salt, and set aside for 30 minutes to draw out the moisture. Then in a skillet over high heat, heat the olive oil. Quickly fry the eggplant until browned. Set aside on paper towels to drain.
  2. In a large skillet over medium heat, melt the butter and add the portobello, salt and pepper to taste, onions, and garlic. After the mushrooms have lost some of their liquid, sprinkle in the cinnamon, nutmeg, herbs and parsley. Pour in the tomato sauce and wine, and mix well. Simmer for 20 minutes. Allow to cool, and then stir in beaten egg.
  3. To make the bechamel sauce, begin by heating the milk to about boiling. Melt the butter in a large skillet over medium heat. Whisk in flour until smooth. Remove from heat and gradually pour in the hot milk, whisking constantly until it thickens. Season with salt, and white pepper.
  4. Arrange a layer of sweet potato as shingles, then a layer of eggplant in a greased 9x13 inch baking dish. Cover eggplant with all of the portobello mixture. Cover with remaining eggplant. Pour the bechamel sauce over the top, and sprinkle with the nutmeg.
  5. Bake for 1 hour at 350 degrees F (175 degrees C).

April 01, 2013

Mint Chocolate Chip Frozen Yogurt

No comments:
Yum


Mint Chocolate Chip Frozen Yogurt

Total time: 1 hour
Yield: 8 servings
Ingredients
  • 2 teaspoons powdered gelatin
  • 1 3/4 cups skim milk
  • 1/2 cup sugar
  • ~18 ounces Greek yogurt
  • 1/2 teaspoon peppermint extract
  • 1 ounce dark chocolate, finely chopped
Cooking Directions
  1. In a large mixing bowl, sprinkle gelatin over 1/2 cup milk.
  2. In a small saucepan, heat the remaining 1 1/4 cups milk with sugar over medium-high heat, stirring frequently. When mixture is boiling, pour into bowl with milk and gelatin and stir until gelatin is completely dissolved.
  3. Stir yogurt into gelatin mixture. Whisk in peppermint extract.
  4. Freeze in an ice cream machine according to manufacturer's instructions.
  5. Toward the end of freezing time, add chocolate.
  6. Serve immediately or freeze to desired consistency.

February 27, 2013

Strawberry Summer Cake

No comments:
Yum

This is a delicious cake, perfect for the summer months when all we want to do is eat strawberries. It is light and goes well after a summer dinner. The addition of barley flour makes it even lighter and smoother. Don't worry if you don't have any though; it works just fine without.


If you have a regular pie pan, this will work fine. If you have a larger one or a deep dish one, either double or 1.5 times the recipe. Extra springiness! Enjoy!

Adapted from Smitten Kitchen.


Strawberry Summer Cake

Yield: 1 cake
Ingredients
  • 6 tablespoons (85 grams) unsalted butter, room temperature
  • 1.5 cups (188 grams) all-purpose flour (can swap half with barley flour)
  • 1.5 teaspoon baking powder
  • 1/2 teaspoon salt
  • 3/4 cup sugar
  • 2 tablespoons sugar
  • 1 egg
  • 1/2 cup milk
  • 1 teaspoon vanilla extract
  • 1 pound strawberries, halved
Cooking Directions
  1. Preheat oven to 350 degrees. Butter a pie pan.
  2. Whisk flour or flours, baking powder, and salt together in a small bowl.
  3. In a larger bowl, beat butter and 3/4 cup sugar until pale and fluffy with an electric mixer, about 3 minutes. Mix in egg, milk, and vanilla until just combined.
  4. Add dry mixture gradually, mixing until just smooth.
  5. Pour into prepared pie plate. Arrange strawberries on top of batter, as closely as possible in a single layer. Sprinkle remaining 2 tablespoons sugar over the strawberries.
  6. Bake cake for 10 minutes then reduce oven temperature to 325 degrees and bake cake until golden brown and a tester comes out free of wet batter, about 50 to 60 minutes.
  7. Let cool in pan on a rack.

December 19, 2012

Homemade Cheddar Cheese

No comments:
Yum

OK, I can't wait any longer. I just have to share this. After two months of aging, I had to try this cheddar. The result was a delicious mild cheddar that I know is only going to improve with age. It went really well with some ham and popovers. Yum!


This cheddar recipe is no more difficult than the gouda recipe. There is only a little more time involved, and the aging is typically longer. However, fresh cheese is awesome, and there will likely be enough for you to age it as long as you like.


Have fun, and let me know if you have any questions. Enjoy!


Homemade Cheddar Cheese

Yield: 1 pound of cheddar
Ingredients
  • 1 gallon whole milk
  • 2 ice cubes buttermilk
  • 1/2 tablet rennet
  • 1/4 teaspoon calcium chloride
  • 1 tablespoon non-iodized salt
Cooking Directions
  1. Mix the rennet in 1/4 cup / 50 ml of water. Mix the calcium chloride in 1/4 cup / 50 ml of water.
  2. Using a double boiler or in a pot, warm the milk and liquid calcium chloride to 90F / 32C.
  3. Add mesophilic starter culture and mix thoroughly with a whisk, the culture must be uniform throughout the milk.
  4. Allow the milk to ripen for 45 minutes to 1 hour.
  5. Slowly pour the diluted rennet into the milk, stirring constantly with a whisk. Stir for 1 minute.
  6. Allow the milk to set for 30 minutes to 1 hour until a firm curd is set and a clean break can be obtained when the curd is cut.
  7. With a long knife or whisk, cut the curds into 1/4 inch cubes.
  8. Allow the curds to sit for 5-15 minutes to firm up.
  9. Slowly raise the temperature of the milk to 100-102F / 39C. It should take as long as 45 minutes to reach this temperature. During this time, gently stir the curds every few minutes so they don't mat together.
  10. Keep the curds at 100-102F / 39C for another 45 minutes. During this time, gently stir the curds every few minutes so they don't mat together. They are done when it holds together in your hand if squeezed.
  11. Drain the whey by pouring through a colander. Do this quickly and do not allow the curds to mat, turning with your hands to allow drainage. Save 1/3 of the whey in the pot.
  12. Suspend the colander with the curds over the double boiler or pot. Stir the curds to separate any particles that have matted.
  13. Heat the curds at 100-102F / 39C for 45 minutes to 1 hour, flipping every 10-15 minutes.
  14. Cut the slab into chunks and into strips. Add the tablespoon of salt and mix thoroughly with hands in 3 stages, waiting 1 minute between each.
  15. Carefully place the curds into your cheesecloth lined mold. Cover with cheesecloth.
  16. Press the cheese at about 20 lbs / 9 kg for 45 minutes.
  17. Remove the cheese from the press and flip it.
  18. Press the cheese at about 40 lbs /18 kg for 3 hours.
  19. Remove the cheese from the press and flip it.
  20. Press the cheese at about 50 lbs / 23 kg for 24 hours.
  21. Remove the cheese from the press. Place the cheese on a cheese board or bamboo mat and dry at room temperature for 1-5 days, until the cheese is dry to the touch.
  22. Wax the cheese and age it in your refrigerator for 3-24 months. The longer the cheese is aged the sharper the flavor it will develop. Be sure to flip the cheese every few days.

December 05, 2012

Homemade Gouda Cheese

No comments:
Yum

Homemade cheese is simple and fairly easy. With the right equipment (which can be bought on the cheap or made at home) and the right ingredients (which can be found online or at various home brew or similar stores), you'll have some delicious cheese in no time.


The types of cheese there are in the world run the gamut. There really is no end to the kind you can make. You might only be limited by your ability to get specific cultures to flavor your cheese. However, this Gouda cheese requires nothing more than regular cultured buttermilk.


The directions are long, but they are detailed. Please do not hesitate to ask me anything. Oh, and it is delicious raw and aged! Enjoy!


Homemade Gouda Cheese

Yield: 1 pound of gouda
Ingredients
  • 1 gallon whole milk
  • 2 ice cubes buttermilk
  • 1/2 tablet rennet
  • 1/4 teaspoon calcium chloride
  • saturated brine
Cooking Directions
  1. Mix the rennet in 1/4 cup of water. Mix the calcium chloride in 1/4 cup of water.
  2. Warm the milk to 85-90F/29-32C in vat of your choice, i.e. double boiler or pot.
  3. Add Starter Culture and Calcium Chloride and mix thoroughly with a whisk to make uniform throughout the milk.
  4. Cover and let the culture ripen at same temperature for 15-45 minutes.
  5. Trickle in diluted rennet stirring constantly for 1 minute to evenly distribute, then stop swirl with ladle to enable better curd set.
  6. Cover and let the milk stand at your target temperature for 45+ minutes until a clean break is achieved.
  7. Cut the curds into 0.2-0.5 inch cubes.
  8. Allow the curds to sit and heal undisturbed for 5-10 minutes.
  9. Stir gently, intermittently for 15-25 minutes to ensure the curds don't mat together.
  10. Let the curds rest for 5 minutes to settle to bottom.
  11. Remove and discard 1/3 volume of whey from top of vat. Add same volume of hot water to reach target 95-102°F / 37-39°C. Normally, 130°F / 55°C water will work.
  12. Stir gently intermittently for 15-30 minutes, breaking any large lumps of curd.
  13. Let the curds rest for 5 minutes to settle to bottom.
  14. Pour the curds into a large strainer or colander and let drain for 5 minutes. If possible, place the strainer inside another pot or cover the curds in order to maintain the curd's temperature. The curds will press better if slightly warm.
  15. Place the curds into cheesecloth lined mold, pack curds down into mold by hand (try to minimize breakage of the curd pack). Place a thin 1 lb. weight on top of the follower and press for 15 minutes.
  16. Remove the cheese from the mold and cheesecloth, flip, replace in cheesecloth and mold and press again at ~2 pounds per US gallon or 0.5 kg per liter of milk used for 15 minutes.
  17. Remove the cheese from the mold and cheesecloth, flip, replace in cheesecloth and mold and press again at ~5 pounds per 1 US gallon / 1 kg per 1 liter of milk for about 1 hour.
  18. Remove the cheese from the mold and cheesecloth, flip, replace in cheesecloth and mold and press again at ~12 pounds per 1 US gallon / 1.5 kg per 1 liter of milk for final ~8-16 hours (i.e. overnight).
  19. Remove the cheese from the press and cheesecloth.
  20. Prepare a saturated brine for the cheese by combining ½ gallon water with 1 lb. cheese salt and bringing to a boil. Stir until salt is dissolved and remove from heat. Add 1 cup whey.
  21. Stir in ½ teaspoon of calcium chloride solution and 1 teaspoon of white vinegar. This will keep the rind from becoming gummy and bring the pH of the brine close to the pH of the cheese. Let the brine cool to room temperature before using. The temperature of the brine should be the same as the cheese.
  22. Place in saturated brine solution for 3-4 hours per pound or 0.5 kg of pressed curds. Sprinkle some salt on top, and be certain to turn the cheese a few times to ensure even rind development.
  23. Note, after brining the cheese will have lost ~5% weight and the outer surface will have become firmer and almost tough.
  24. Place the cheese on a drying mat. After 1-5 days the cheese should be dry to touch and then it can be waxed. Or it can continue to be aged with a natural rind.
  25. If natural rind, if unwanted molds appear on rind, clean with a low 2-3% brine and cloth or disposable paper towel. After cheese hardens, a brush can be used with brine.
  26. Turn cheese and replace mat if moist initially every 2 days then every week and eventually every month if age that long.
  27. Consume after 2 weeks to several years. Flavor changes with age.

October 24, 2012

Peruvian Spicy Creamed Chicken - Aji de Gallina

1 comment:
Yum

If you, like us, have a friend bequeath you packets of aji pepper puree, you may be dumbfounded at first too. Well look no further because you've found the answer to your aji prayers!

By far the best Peruvian dish we have ever made. OK so it's also the only Peruvian dish we've ever made. Yet after devouring this Aji de Gallina I'm not sure I could force myself to make any other Peruvian cuisine - it's that good.

This is a beautifully simple, though perhaps time-consuming dish to make. But the great thing is that it makes a ton of food. Great for dinner parties.


Peruvian Spicy Creamed Chicken - Aji de Gallina

Yield: Serves 6-8
Ingredients
  • 1 1/2 lb. chicken breast
  • 4 cups chicken stock
  • 1/2 cup canola oil
  • 1 packet aji pepper puree
  • 2 cloves garlic, chopped
  • 1 large onion, chopped
  • 3 tablespoons walnuts, chopped
  • 3 tablespoons Parmesan cheese
  • 4 slices bread
  • 3/4 cup evaporated milk
  • 4 yellow potatoes
  • 2 hard boiled eggs
  • 10 black olives, halved
  • 1/4 - 1/2 cup cooked rice
Cooking Directions
  1. Cook the yellow potatoes in salted water until tender when pierced with a fork. Let cool, peel, cut into quarters, and set aside.
  2. Place the bread in a small bowl and pour the evaporated milk over it to soak. Set aside.
  3. Place the chicken breasts in a pot with the chicken stock, and bring to a simmer. Cook for 10-15 minutes, until chicken is just barely cooked through. Set chicken aside to cool. Strain broth and reserve 2 cups.
  4. In a blender, process pepper puree with the oil until smooth. Saute the garlic and onions with the pureed peppers and oil, until the onions are soft and golden. Remove from heat and let cool.
  5. Shred the cooled chicken into bite-size pieces.
  6. In a blender or food processor, process the evaporated milk and bread mixture with the walnuts and Parmesan cheese until smooth. Add the cooked onion mixture and process briefly.
  7. Return onion mixture to pan, and add 1 1/2 cups of the reserved chicken stock. Bring to a low simmer, and stir in the chicken. Heat until warmed through, adding more chicken stock if sauce is too thick.
  8. Serve over rice, garnished with the yellow potatoes, slices of hard boiled egg, and black olives.

October 10, 2012

Slow Cooker Chocolate Cake

No comments:
Yum

Wow! This is so cool is so many ways. Cake in a slow cooker. Delicious cake in a slow cooker. Moist, chocolatey, rich cake in a slow cooker. Simple and amazingly easy.


I don't know if I can get over how flabbergasted I am that this turned out so gorgeously well. So warm and dark and moist - absolutely the best cake I've ever made. One of the best parts is that it's a cake without frosting (because I generally despise frosting). OK, I'm going to just hand you the recipe now, both so that you can make it yourself and so I can grab another piece. Enjoy!


Slow Cooker Chocolate Cake

Yield: 8 servings
Ingredients
  • 1 cup white sugar
  • 3/4 cups and 2 tablespoons all-purpose flour
  • 1/4 cup and 2 tablespoons unsweetened cocoa powder
  • 3/4 teaspoon baking powder
  • 3/4 teaspoon baking soda
  • 1/2 teaspoon salt
  • 1 egg
  • 1/2 cup milk
  • 1/4 cup canola oil
  • 1 teaspoon vanilla
  • 1/2 cup boiling water
Cooking Directions
  1. Spray crock of a 2 quart slow cooker with cooking spray.
  2. In a medium bowl, whisk the sugar, flour, cocoa, baking soda, baking powder and salt. In a separate small bowl, whisk together the eggs, milk, oil, and vanilla until well combined. Whisk in the boiling water. Pour the wet ingredients into the dry and mix well.
  3. Pour the cake batter into the prepared slow cooker.
  4. Set slow cooker to low. Cook until cake has no wet spots on top and has pulled away from the sides of the crock, about 4 hours. DO NOT remove lid at any time, otherwise you'll lose moisture. Turn off slow cooker and allow cake to rest for 30 minutes before serving.

April 06, 2012

Cinnamon Raisin Swirl Bread

No comments:
Yum

A lovely Cinnamon Raisin Swirl Bread is the perfect way to lighten up your day.


With soft swirls of cinnamon, a light and springy interior, and raisins throughout, what more could you ask for?


The absolute true beauty of this is that it's not sugared down. You can taste the subtleties of the different ingredients, which compliments a nice spot of tea. Use in your own Croatian Easter Breakfast or any which way. Enjoy!

March 06, 2012

Savory Butternut Squash and Kale Bread Pudding

No comments:
Yum
Ingredients

2 lbs peeled seeded butternut squash, cut into 1-inch cubes (about 6 cups)
7 large eggs
2 1/4 cups half & half
6 tbsp dry white wine
1 1/2 tsp dijon mustard
1 sourdough baguette
1 cup chopped shallots (about 4 large)
2 bunches kale, ribs removed, coarsely chopped
8 oz. extra-sharp cheddar cheese, grated
olive oil
kosher salt and pepper

Directions

Cut baguette into 1-inch cubes and (if not dry) toast in 200 degree oven for about 10 minutes, until bread is dry, like day-old bread. Turn oven up to 400 degrees. Toss squash with 1 tbsp olive oil on rimmed baking sheet, sprinkle with salt and pepper, and bake until squash is tender, about 20-25 minutes. Turn with spatula occasionally.

Whisk eggs in large bowl, add half & half, wine, mustard, and 1 1/2 tsp kosher salt and whisk to blend. Set aside.

Heat about 2 tbsp oil in large pot over medium-high heat. Add shallots and saute until soft, about 5 minutes. Add kale. Cover and cook 2 minutes. Uncover and stir until kale is wilted but still bright green, about 5 minutes. (I cook mine longer, though, because I like the kale less crunchy.)

Reduce oven temperature to 350. Generously butter 13x9x2-inch baking dish. Spread half of bread cubes in the bottom, topped with half of kale mixture, then half of squash, and sprinkled with half of cheese. Repeat with remaining bread, kale, squash, and cheese. Pour egg mixture over the bread pudding. Cover with foil and bake for 20 minutes. Remove foil and bake uncovered until custard is set and bread feels springy to the touch, about 20 minutes longer. Broil 2 minutes right before serving until cheese browns slightly.

Notes:
*I don't like soggy bread pudding, so I altered the original recipe a little. Here are the things I did, so you can decide how you like it best.
* The recipe didn't call to toast the bread, just to cut it up, but I like it more stale.
*The recipe said to soak the bread in the egg mixture for 30 minutes before baking, but I completely skipped this step because I didn't want all soggy bread.
* When I did finally pour the egg mixture in the pan right before baking, I made sure not to completely cover the top pieces of bread, making sure they were still dry on top.
* I used more cheese

From the kitchen of Liza Wilson

October 05, 2011

Homemade Cream Cheese

No comments:
Yum

If you've made labneh or greek yogurt or yogurt cheese before, then you can most likely make your very own homemade cream cheese.


This homemade cream cheese resulted from the leftover whey after making labneh. The whey was still milky in appearance and not that yellow/green hue we've all come to know and love and feed our pets, plants, smoothies, etc. So I tried to strain the rest of the whey as much as I could, and the result was a cream cheese as tasty as any I've ever had. It doesn't even have that yogurt taste to it. Enjoy!

Ingredients

yogurt from whole milk

Directions

After making yogurt from whole milk, and making labneh or greek yogurt or yogurt cheese or at least straining the yogurt for 6 hours or more, strain the whey for 24 hours through cheese cloth. If it's still not the right consistency, strain some more or add a splash of whey back in. The result will be fantastic!

September 25, 2011

Labneh

No comments:
Yum

Never heard of labneh? It's essentially strained yogurt cheese popular in the Middle East. It's one of the simplest and easiest cheeses to make. If you can make yogurt, you can make labneh!

One of the best things about it is that you retain the probiotics of yogurt, and this also helps keep the cheese for much longer than normal cheeses or even regular yogurt. Enjoy by slicing off a piece (will be slightly crumbly perhaps), sprinkle with a hint of salt and a slice of tomato on toast. It can also be used like feta in any recipe. Enjoy! 

Ingredients

1 gallon milk, whole (will give a better flavor and consistency than skim)
1/2 to 1 cup yogurt

Directions

1. Heat up the milk in a large pot to boiling, stirring so the milk does not burn on the bottom. Turn off the heat and let cool down to around 100-105 degrees.

2. Mix yogurt and milk in a separate container with a lid. Let sit at room temperature or in the oven for 8-12 hours, until yogurt has been made.

3. Strain yogurt through a cheese cloth for 8-12 hours. Squeeze out extra whey from cheese at the end and place into a container. Alternatively, use cheese cloth and a cheese press to get it like the picture.