July 28, 2010

Ebelskivers!


We got a gift recently - an ebelskiver pan. You probably know what an ebelskiver is already, but just in case you don't....think of an ebelskiver as a puffy filled pancake. Pretty awesome, huh?

Sure, you can go around using fancy and homemade ebelskiver/pancake batter, but not I. Why do that when all the fun is in the filling? That's where creativity reigns supreme!


For instance, you could do banana in one, chocolate tahini in another, honey and nut butter in another, strawberry jam in another, banana and peanut butter and bacon in another, and bacon and cheese in the last one. Ohhh yeah.


So let your heart and your imagination be your guide. Enjoy!

July 23, 2010

New and Improved Homemade Greek Yogurt


I stated in the original Homemade Yogurt post that I was "100% convinced a generic brand will work equally as well" as Fage. Turns out I was right (for once).


The steps are more or less the same as before - just a different yogurt starter and two different kinds of milk.


Left: 2% reduced fat milk. Right: nonfat skim milk.


However, this batch turned out better. Maybe it was the different live and active cultures. Maybe it was the use of the oven light method.


Maybe it was the mixing of two different kinds of store bought yogurt (0% and 2% for later comparison purposes) that made it better. Or maybe more probiotic yogurt starter helped. Who knows. But the end result is a New and Improved Homemade Greek Yogurt.


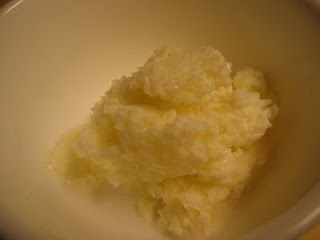
Closeup of the 2% yogurt. It comes out creamier than the 0%, and it's only a minor difference in fat and overall calories, so go with this one. However, avoid the whole milk if you're looking to cut saturated fat.


After it's strained, making it Greek yogurt, do whatever you like with it. I hear putting a dollop of peanut butter on top and pairing it with half a frozen banana really makes for a killer morning. Enjoy!

New and Improved Homemade Greek Yogurt

Yield: 1/2 gallon yogurt
Ingredients
  • 1/2 gallon milk (0%, 1%, or 2%)
  • 1/2 cup yogurt, store-bought (fat content doesn't matter, so whichever has the probiotics you want and that you'll want to eat the rest of)
Cooking Directions
  1. Heat the milk in a pot. BE CAREFUL not to boil the milk. Turn off the heat just as bubbles start to form and stir.
  2. Let milk cool to about 110-115 degrees or for perhaps 10-15 minutes. The probiotics will start dying at around 118. Use a thermometer if unsure.
  3. Pour milk into a container. Take the 1/2 cup of yogurt and mix it in once the milk has cooled some.
  4. Turn the oven to its lowest setting for a minute. Then shut it off, turn on the oven light, and place the milk + yogurt in the oven for 6-24 hours, depending on how much you want the bacteria to grow.
  5. Place in the fridge another day. Go ahead and enjoy as-is or strain the yogurt through a layer or two of cheesecloth overnight to create Greek yogurt.
And now you've made your very own homemade yogurt!

July 20, 2010

2nd Birthday Breakfast


More delicious birthday breakfast surprises! A complete breakfast, featuring a fantabulous omelette topped with mushroom, bell peppers, feta, and avocado. Sitting beside it is some King's Hawaiian sweet bread, bacon, and mango slices.


There's just something about being woken up to breakfast being lovingly prepared just for you, you know? What's your favorite memory of someone fixing breakfast for you?

July 16, 2010

Honey Tart Frozen Yogurt


*Beatles tune starts...now!* "Love, love, love. Love, love, love. Love, love, love. There's nothing you can do that can't be done..."


Anyway, that's pretty much how I feel about this frozen yogurt. Ever since the Strawberry Sorbet turned out surprisingly awesome, I've been wanting to make another kind of frozen treat. I'm not huge on ice cream (we don't mix well), so frozen yogurt was the way to go.

This is even easier than the sorbet. As someone I know would say, "It's stupid simple." Use the same process as when making the sorbet. It doesn't get easier than that.


This recipe is adapted from the Tart Vanilla Frozen Yogurt by Healthy Food For Living, where it's ultimately adapted from David Lebovitz's The Perfect Scoop, of course.

The difference between mine and HFFL is I wanted to test out regular yogurt instead of Greek yogurt, and I used less sweetener (only 1/4 cup instead of 1/2 cup) and went with honey so the tart could shine through. What happens is that both the honey flavor and tart are distinct yet meld together for a truly honey tart frozen yogurt. Probably because the yogurt wasn't strained or Greek-style, it hardens up and can be a little icy at first. Just let it rest on the counter for a few minutes, and you're golden. Next time I'll either try it Greek or add a dash of rum, both for flavor and creaminess. Enjoy!

July 12, 2010

Spinach Feta Mushroom Omelette


Birthday breakfasts are the best. You wake up to the smell of deliciousness wafting throughout your home, knowing someone special is fixing you something special. 


You lay in bed for a few minutes until you're greeted by a smile and called forth to enjoy your birthday breakfast surprise.


You rush out to find a big plate full of tasti- (and healthi-) ness waiting for you. Ah, life is good.


I don't think I need to tell you how to make an omelette, right? If so, please ask!

July 07, 2010

Fast Pickled Zucchini and Peppers

My first pickling! I was so excited to try this out because it's fast. I always imagined pickling would take forever and a day (and I know sometimes it does), but not this time!

(the one on the right has zucchini and bell peppers, and the one on the left has just zucchini)

The turmeric really gives this a nice color. So much more fun than a clear brine. The jars sealed perfectly too. I was almost flabbergasted at how easy this was.

I didn't have any cucumber to try this on, but there were some bell peppers and zucchini that needed to get used, so voila. The day after it was sealed, the zucchini tasted great, though the peppers weren't as flavored. On the third and fourth day, the zucchini starts to take in more of the vinegar I think, so maybe eat that first. The bell peppers, on the other hand, just keep getting better.

Enjoy!

Adapted from Martha Stewart.
Fast Pickled Zucchini and Peppers

Yield: 3 1/2 cups
Ingredients
  • 2 zucchini, sliced
  • 1/2-1 bell pepper, cut into small strips
  • 3 cups white vinegar
  • 2 teaspoons coarse salt
  • 1 teaspoon celery flakes
  • 1/2 teaspoon dried onion
  • optional: 1/2 teaspoon crushed red pepper
  • 1/8 teaspoon turmeric
Cooking Directions
  1. In a medium saucepan, combine all ingredients except the prepared veggies.
  2. Bring to a boil, stirring to dissolve sugar.
  3. Arrange prepared vegetables in one or more jars.
  4. Pour hot brine into jar to completely cover vegetables and seal jar.
  5. Refrigerate until cool.

July 04, 2010

Strawberry Sorbet


Did you know strawberries are the only fruit with their seeds on the outside? Pretty cool, huh? Food (heh heh) for thought. And that's your Fourth of July humor of the day!


Nothing beats a cold treat on a hot summer day. Nothing, I say, except more cold treats! It's hard NOT to overindulge in this beauty of a dessert. It's so perfect in the middle of the day...and on a humid night...and maybe for breakfast...

I think the rum really helped to keep it from getting too icy. I don't have a fancy schmancy ice cream maker, so I go with the tried and true freeze and churn then freeze and churn method. Works like a charm. Next up: frozen tart yogurt. Enjoy!

July 01, 2010

Mixing Bowls

As a featured publisher for Foodbuzz I check out the Daily Specials from time to time. Today, the daily special is a set of stainless-steel mixing bowls. Look, Ma, it even has an easy-grip rim.

Need it? No way! But is it awesome? Totally!

I have my own metal mixing bowl that I use quite often. It just gets the job done better sometimes (as used with the Loco Moco - Turkey Style, Healthy Zabaione, Smashed Potatoes with Garlic, and Pumpkin Oatmeal Cookies).